Is your basement floor or foundation wall starting to crack? You aren’t alone. Basement cracks are the #1 concern for homeowners because they often signal water leaks or foundation settling.
However, not all basement cracks are the same. A crack in your floor is usually very different from a crack in your wall.
This guide will teach you how to fix concrete cracks in your basement properly and, more importantly, how to tell when a crack is a warning sign of a bigger problem.
The Short Answer (Quick Summary)
To fix minor basement floor cracks, you must clean and widen the crack before filling it with a semi-rigid filler.
⚠️ Critical Warning for WALLS: If you have a vertical or diagonal crack in your foundation wall, do not just patch over it. Wall cracks are the #1 entry point for water. Applying a surface patch traps water inside the wall, leading to deterioration. These require High-Pressure Injection to be fixed permanently.
Phase 1: Diagnose the Crack (Wall vs. Floor)
Before you buy any tools, look at where the crack is. The location tells you everything.
| Crack Location | Likely Cause | Can I DIY? | Recommended Fix |
|---|---|---|---|
| Basement Floor | Shrinkage (Concrete drying) | Yes | Chase & Fill with Polymer |
| Cove Joint (Where floor meets wall) | Hydrostatic Pressure | NO | Internal Weeping Tile System |
| Foundation Wall (Vertical) | Settling / Freeze-Thaw | NO | Epoxy/Polyurethane Injection |
| Foundation Wall (Horizontal) | Soil Pressure (Bowing) | NO | Structural Reinforcement (Call ASAP) |
Phase 2: The Tools & Materials You Need
To fix a basement floor crack so it doesn’t reopen, you need the right setup.
The Shopping List:
Safety Gear: Safety glasses, N95 mask (concrete dust is dangerous), and gloves.
Prep Tools: Angle grinder with a diamond masonry blade (essential for floors).
Cleaning: Shop vac with a HEPA filter.
The Filler:
For Floors: Semi-rigid Polyurea or Epoxy filler (needs to be hard enough to walk on but flexible enough not to snap).
For Small Wall Spots: Hydraulic Cement (Temporary cosmetic fix only).
Phase 3: Step-by-Step Guide to Fixing Floor Cracks
Follow these steps to fix non-leaking shrinkage cracks in your concrete basement floor.
Step 1: “Chase” the Crack (Widen It)
Most DIY repairs fail because the crack is too thin to hold the filler.
The Technique: Use your angle grinder to cut a shallow groove along the crack line. You want to turn a hairline crack into a clean “V” channel about ¼ inch wide.
Why? This removes the weak, crumbling edges and gives the new filler a solid surface to bond to.
Step 2: Deep Cleaning
Vacuum the crack thoroughly.
Pro Tip: Wipe the inside of the crack with a rag soaked in acetone. This removes moisture and dust, ensuring the filler sticks permanently.
Step 3: Overfill and Smooth
Squeeze your semi-rigid filler into the crack until it slightly overflows.
Unlike wall putty, floor filler settles as it dries. Overfilling ensures it doesn’t shrink into a divot.
Use a putty knife to scrape it flush with the floor immediately.
Step 4: Finish (Optional)
If you plan to paint the floor or lay carpet, wait 24 hours for the filler to fully cure.
🛑 When to Stop and Call a Professional
Are there any step-by-step tips to fix multiple cracks in concrete without professional help? Yes, for floors. But for walls, DIY is risky.
If you see these signs, put the tools down. You need a professional assessment:
Water Stains on the Wall: If the crack has white powder (efflorescence) or dark water stains around it, it is actively leaking. A surface patch will fail. It needs Injection.
Wide Wall Cracks: If you can fit a dime into a wall crack, your foundation is moving. You need a structural check.
Heaving Floors: If one side of the floor crack is higher than the other (tripping hazard), the soil below is swelling. Filler won’t fix the underlying shift.
Need a Permanent Wall Repair?
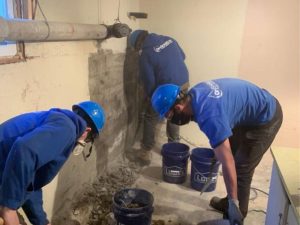
Don’t risk a flooded basement with a temporary patch. We use commercial-grade injection resins to seal wall cracks from the inside out—guaranteed. visit our main page on basement wall cracks
How do I fix cracks in concrete walls?
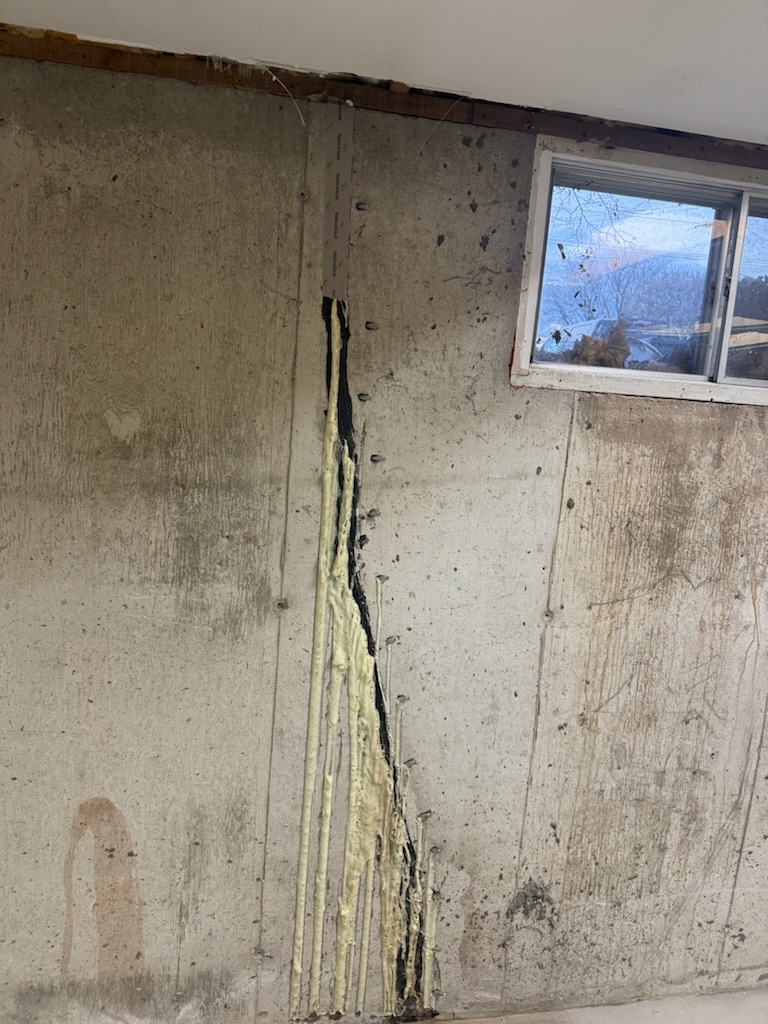
The only permanent way to fix a foundation wall crack is using Low-Pressure Injection. Unlike surface patches (like hydraulic cement) that only cover the surface, injection forces resin through the entire thickness of the wall—usually 8 inches deep—sealing it from the inside out.
The Two Types of Injection:
Epoxy Injection (Structural): Used for dry cracks where structural strength is lost. The epoxy cures harder than the concrete itself, effectively “welding” the wall back together.
Polyurethane Injection (Waterproofing): Used for leaking or wet cracks. This foam reacts with water and expands up to 20 times its volume, filling every microscopic void to stop leaks instantly.
Expert Note: If your wall crack is horizontal or “stair-stepping” through blocks, injection alone may not be enough. These are signs of structural bowing and may require carbon fiber reinforcement straps.
How do you fix cracks in a basement floor?
For basement floor cracks, the “Chase and Fill” method is the industry standard for a long-lasting repair. Simply squeezing caulk into a dirty crack will fail within months. To fix it properly, you must mechanically prepare the concrete first.
Step-by-Step Floor Repair Process:
Chase: We use a diamond-blade angle grinder to cut a “V” shape into the crack, widening it to at least 1/4 inch.
Clean: We vacuum all dust and wipe the groove with acetone to ensure a perfect bond.
Fill: We overfill the crack with a semi-rigid Polyurea or Epoxy filler.
Shave: Once cured, we shave the filler flush with the floor for a smooth, seamless finish.
Why this works: Floor cracks are usually caused by concrete shrinkage. By widening the crack, we remove the weak, crumbling edges, ensuring the new filler holds tight even if the floor shifts slightly.
Which products are best for foundation crack repairs?
The “best” product depends entirely on whether the crack is moving and where it is located. Using a rigid product on a moving crack (or a flexible product on a structural crack) is the #1 reason DIY repairs fail.
Product Selection Guide:
| Application | Best Product | Why It Works |
|---|---|---|
| Leaking Wall Cracks | Hydrophobic Polyurethane Foam | Flexible; expands 20x to chase water deep inside the wall. |
| Structural Wall Cracks | Low-Viscosity Epoxy Resin | Cures harder than concrete to restore structural integrity. |
| Basement Floor Cracks | Semi-Rigid Polyurea | Hard enough for traffic, flexible enough not to snap. |
| Cosmetic Only | Hydraulic Cement | NOT RECOMMENDED for waterproofing; surface patch only. |
Can I fix multiple concrete cracks without professional help?
Yes, you can DIY hairline shrinkage cracks on floors, but you should NOT attempt to DIY leaking foundation wall cracks. Attempting to patch a leaking basement wall from the inside without injection tools is dangerous. It traps water inside the wall, which saturates the concrete and accelerates structural decay.
✅ Safe to DIY: Spiderweb cracks on garage floors, hairline shrinkage cracks on dry basement slabs.
❌ Call a Professional: Cracks that are actively leaking, cracks wider than a dime (1/8 inch), horizontal cracks on walls, or diagonal cracks extending from window corners.
Expert Note: If you have multiple cracks appearing at once, it is rarely a coincidence. It usually signals a drainage issue or foundation settlement that requires a professional diagnosis, not just a patch.