| Getting your Trinity Audio player ready... |
A basement is a crucial component of any home. It supports the structure above, stores valuable items, and can even be used as extra living space. But because it sits below ground level, it is always at risk of water damage. Rainwater, melting snow, and groundwater pressure can all push moisture through cracks or weak spots in the foundation. Over time, this can lead to leaks, dampness, and severe damage.
The best way to prevent these problems is through basement waterproofing. This process prevents water from entering, protects the structure, and helps extend the home’s lifespan.
In this guide, we will walk through the step-by-step process of professional basement waterproofing, explaining what happens at each stage so you know what to expect.
The Complete Process of Professional Basement Waterproofing
Step 1: Initial Inspection and Problem Assessment
The first stage is a complete inspection. Professionals inspect the inside and outside of the basement to determine the source of the water.
Indoors, they look for cracks, damp patches, peeling paint, or mould growth. Outdoors, they examine the slope of the soil, drainage conditions, and the state of the foundation walls.
Without a careful inspection, the cause of the water problem may be missed, making it harder to fix.
Step 2: Identifying and Repairing Foundation Cracks
Cracks in the foundation are one of the most common reasons water enters a basement. Even tiny cracks can allow water under pressure to seep into the structure.
Professionals often use epoxy or polyurethane injections to seal these cracks. This not only blocks water but also strengthens the wall.
For homeowners facing leaks, basement crack repair is a key step. By addressing the primary entry points for water, the basement becomes significantly safer from damage.
Step 3: Interior Sealants and Coatings
The next stage is applying waterproof coatings or sealants to the inside of the basement walls and floors. These coatings act as a barrier against minor leaks and moisture.
Interior sealants are especially useful when outside excavation is not possible. They help control dampness and provide an extra layer of protection. However, they are usually paired with other methods for long-lasting results.
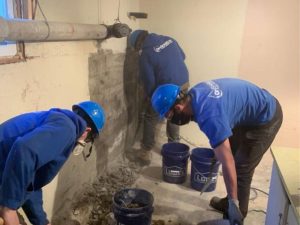
Step 4: Installing an Interior Drainage System
In basements where water seeps through the floor or wall joints, an interior drainage system is often the most effective solution. Contractors place perforated pipes beneath the floor slab to collect the water.
The pipes direct the water into a sump pit, where a pump removes it from the basement. This ensures water never gathers on the floor.
This system is common in areas where the water table rises during heavy rainfall, and it plays a crucial role in wet basement repair.
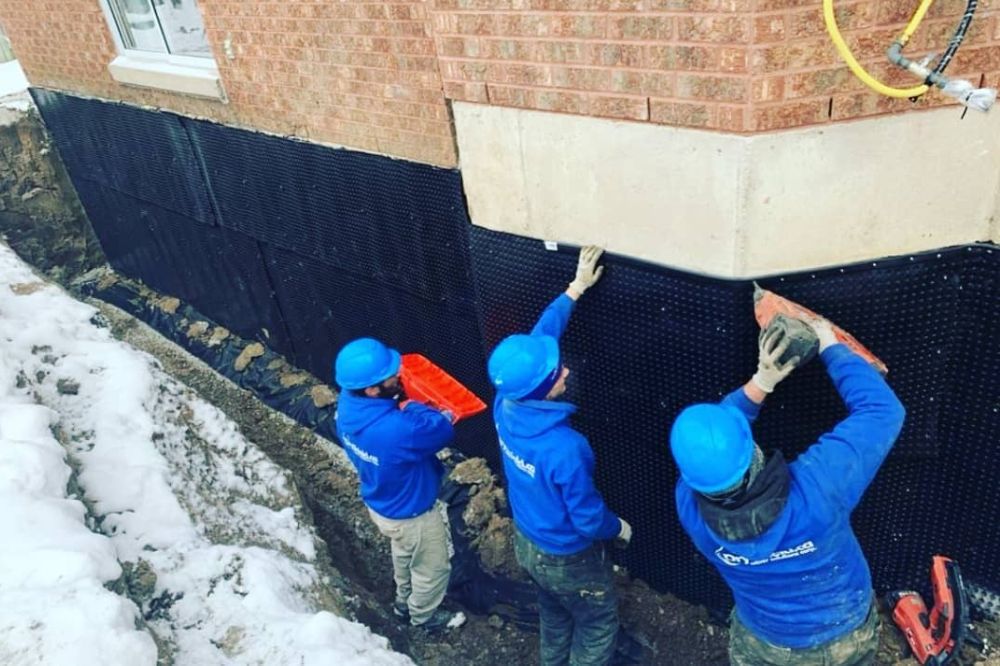
Step 5: Exterior Excavation and Waterproofing
Exterior waterproofing is a more permanent solution. It involves digging up the soil around the basement walls to expose the foundation.
Once exposed, the walls are cleaned, cracks are sealed, and a waterproof membrane is applied. Drainage pipes are also installed at the bottom to redirect water away from the home.
This process is more labour-intensive but highly effective, as it prevents water from reaching the basement walls altogether.
Step 6: Sump Pump Installation
A sump pump provides additional protection for homes that frequently experience water problems.
The pump is located in a pit where water from the drainage system collects. As soon as the water level rises, the pump switches on and pushes the water outside through a discharge pipe.
This ensures the basement stays dry, even during storms or snowmelt. Having a sump pump gives homeowners confidence that water will not cause sudden flooding.
Step 7: Improving Exterior Drainage and Grading
Even the best waterproofing system requires effective drainage to function properly. If the ground around the home slopes towards the foundation, water will collect and increase pressure against the basement walls.
Contractors often regrade the soil so that it slopes away from the house. They may also extend downspouts or add extra drains.
By improving drainage, the overall waterproofing system becomes stronger and more reliable.
Step 8: Final Testing and Maintenance Advice
The last step is to test the full waterproofing system. Contractors ensure the sump pump is working, the coatings are holding, and the drains are flowing correctly.
Homeowners are often provided with maintenance tips as well. These include regularly checking pumps, cleaning gutters, and inspecting for new cracks. Regular upkeep ensures the basement stays dry for years to come.
Wrapping Up!
A basement that stays dry is crucial for both the structural integrity and the value of a home. The step-by-step process of waterproofing includes inspection, crack repair, interior protection, drainage systems, sump pumps, exterior sealing, soil grading, and final checks. Together, these steps protect the foundation and reduce the risk of costly repairs.
When water problems are ignored, they tend to get worse over time. Taking action early ensures that the structure stays safe and the living space remains usable.
For complete solutions and reliable service, homeowners in Toronto can turn to Dryshield Waterproofing Toronto, a trusted name in keeping basements dry and secure. If you notice water seepage or would like an expert opinion, you can contact us to arrange a comprehensive basement inspection.