Last updated: May 2026 | Reviewed by Jonathan McMahon, Owner, Dryshield Basement Waterproofing | 25+ years of basement waterproofing experience and over 300,000 linear feet completed across Toronto, the GTA, and Southern Ontario.
Quick Answer: How to Fix a Leaking Basement from the Inside
To fix a leaking basement from the inside, follow this proven sequence: (1) diagnose the water source by inspecting walls, joints, and floor during rainfall; (2) seal active wall leaks with hydraulic cement for an immediate fix; (3) repair foundation cracks using polyurethane injection for active leaks or epoxy injection for structural cracks; (4) install an interior weeping tile system tied to a sump pump if water enters at the floor/wall joint or through the floor; and (5) address surface water issues including grading, gutters, and window wells. Interior repairs range from $750 for a single crack injection to $13,500–$22,500 for a full interior weeping tile system, depending on scope, and stop water from entering the living space. For permanent foundation protection, exterior waterproofing remains the gold standard.
Why Is Your Basement Leaking? Understanding the Root Causes
Basement leaks rarely happen by accident. After completing over 300,000 linear feet of basement waterproofing across Toronto and Southern Ontario, our team at Dryshield has identified four root causes that account for nearly every basement leak we encounter.
1. Hydrostatic Pressure (The #1 Cause in the GTA)
When soil around your foundation becomes saturated with water, it exerts pressure against the concrete in every direction. A foundation wall can experience over 1,400 pounds of force per square foot at 6 feet below grade. When this hydrostatic pressure exceeds your foundation’s ability to resist water, moisture is forced through tiny pores in the concrete, through cold joints, through cracks, and up through the floor/wall joint.
In the GTA, hydrostatic pressure is intensified by “Peel Clay” — the heavy, non-porous clay soil common in Mississauga, Brampton, Vaughan, and most of the Peel and York regions. This clay holds water against your foundation like a saturated sponge instead of letting it drain away naturally.
2. Failed or Clogged Weeping Tile
Weeping tile is the drainage pipe installed around your foundation footing that’s supposed to carry groundwater away. Homes built before 1980 typically used clay tile or early “Big O” perforated pipe. After 40 to 60 years, these systems collapse, get crushed by tree roots, or clog with silt. Once the weeping tile fails, groundwater pools against the footing and pushes upward through the floor/wall joint — one of the most common leak patterns we see in Toronto’s older neighborhoods like Roncesvalles, the Beaches, Riverdale, and Bloor West Village.
3. Foundation Cracks
Concrete shrinks as it cures, creating hairline cracks. Soil settlement, freeze-thaw cycles, and the weight of the house itself create wider structural cracks over time. Both let water through. The difference matters because each requires a different repair method (covered below).
4. Surface Water and Improper Drainage
The most overlooked cause. Clogged gutters, downspouts that discharge near the foundation, window wells without drains, and grading that slopes toward the house all dump surface water against your foundation walls. We’ve seen $10,000 interior waterproofing projects that could have been prevented with $200 of grading work.
How to Find the Source of Your Basement Leak
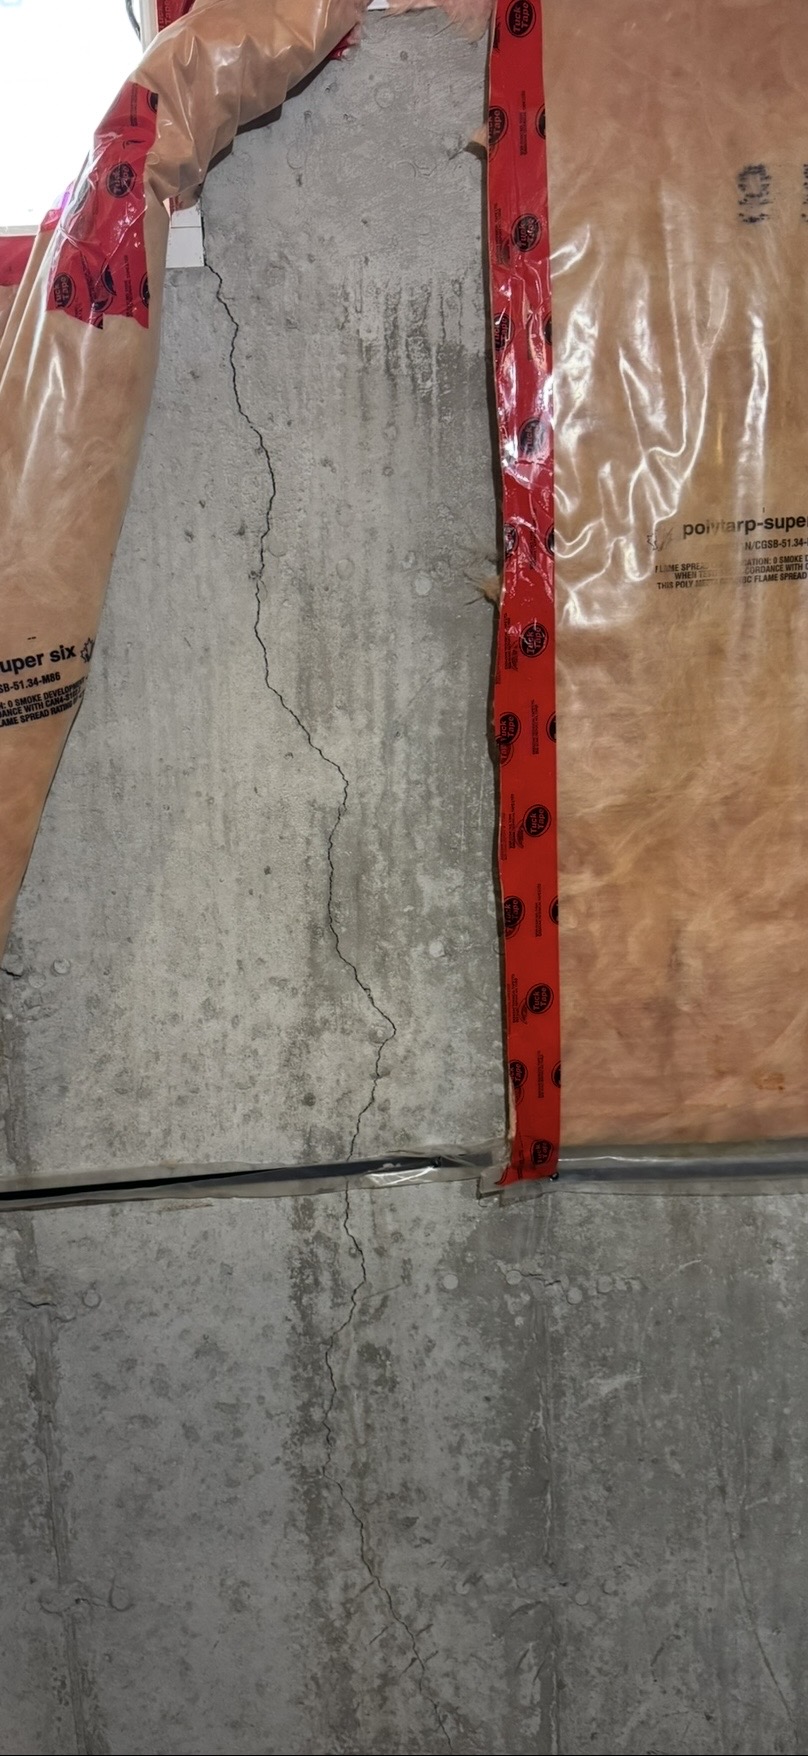
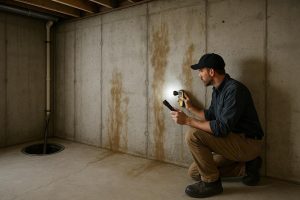
Before you can fix a leak, you need to know exactly where the water is coming from. Here are the diagnostic methods Dryshield technicians use during free in-home inspections — methods you can replicate yourself:
The Paper Towel Test
During or immediately after rainfall, place dry paper towels along suspect areas — the floor/wall joint, around windows, along walls. Check every 15 minutes. The first paper towel to get wet tells you where water is entering first.
The Weather Correlation Method
Keep a simple log: date, type of weather event (heavy rain, light rain, snow melt, thunderstorm), and whether you saw water. Patterns emerge fast. A leak that only appears after heavy thunderstorms suggests overwhelmed storm sewers or surface water. A leak after every rain suggests a foundation crack or weeping tile failure. A leak only during spring thaw suggests a high water table.
The Moisture Meter Method
A pinless concrete moisture meter ($50–$150 at any hardware store) detects moisture inside walls and floors even when they look dry. Scan walls in a grid pattern. Hot spots reveal hidden moisture paths long before mold or efflorescence appears.
The Dye Test (For Window Wells and Surface Water)
Pour a few drops of food coloring or fluorescent tracer dye into the suspected source — a window well, a low spot in the lawn, a gutter outlet. Check inside the basement 24 to 48 hours later. If the dye appears, you’ve confirmed the path. This is the same technique professional waterproofing inspectors use.
The Efflorescence Map
White chalky deposits (efflorescence) form where water has passed through concrete and evaporated, leaving mineral salts behind. Map every spot of efflorescence on your walls and floor. The pattern reveals your hidden water paths — even leaks you’ve never seen actively running.
Common Signs Your Basement Is Leaking From the Inside
- Water at the floor/wall joint (cove joint) — Strongest indicator of hydrostatic pressure or weeping tile failure.
- Damp drywall, bubbling paint, or peeling wallpaper — Water seeping through porous concrete or block.
- Visible crack with an active drip — Foundation crack (the easiest leak type to repair).
- Water pooling on the floor or around the sump pit — High water table, failed sump pump, or failed weeping tile.
- White chalky residue (efflorescence) — Past or ongoing moisture migration. Wipes away easily; comes back.
- Musty smell or visible mold growth — Chronic moisture, even without standing water.
- Rust stains on metal supports or appliances — Sustained humidity above 60%.
- Water spots that only appear after specific weather events — Surface water or hydrostatic pressure.
- Cracks in basement floor — Settlement or hydrostatic pressure pushing up from below.
Types of Foundation Cracks and What Each One Means
Not all foundation cracks are created equal. Identifying the type of crack determines whether you can DIY-repair it, whether you need professional injection, or whether you have a structural problem that requires an engineer.
Vertical Cracks (Most Common)
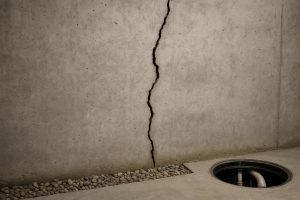
Vertical hairline cracks running straight up and down are usually caused by concrete shrinkage during the curing process. They’re rarely structural but they DO leak. Polyurethane injection seals them permanently. Cost: $750–$1,500 per crack professionally.
Diagonal Cracks
Cracks running at a 30 to 75-degree angle, typically wider at the top, indicate differential settling — one part of your foundation is sinking faster than another. These often leak and may require both injection and structural assessment. Cost: $750–$2,500 per crack.
Horizontal Cracks (Serious)
Horizontal cracks running along the wall, especially mid-wall, indicate severe lateral pressure from soil — either freezing soil expansion or hydrostatic pressure. These can lead to foundation wall failure. Do NOT inject without first consulting a structural engineer. Often requires exterior excavation plus structural reinforcement.
Stair-Step Cracks (Block Foundations Only)
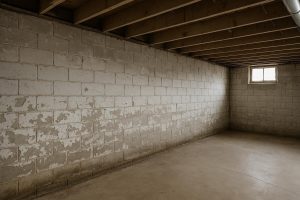
Cracks that follow the mortar joints of a cinder block foundation in a stair-step pattern indicate settlement or pressure. Block foundations cannot be effectively injection-repaired because the blocks are hollow — water travels laterally through the cores. These walls need a full interior waterproofing system or exterior excavation.
Floor Cracks
Cracks in the basement floor itself are usually shrinkage cracks and rarely structural, but they can let water up from below if your water table is high. Inject with polyurethane if water is actively coming through.
Tools You’ll Need for DIY Basement Leak Repair
If you’re attempting an interior fix yourself, here’s the realistic tool list. Skip the tool you don’t have — buy the right one. Half-DIY repairs fail more often than they succeed.
- Wire brush — For cleaning out cracks before sealing ($10)
- Hammer and cold chisel — To widen tight cracks into a V-groove ($25)
- Shop vacuum — Critical for removing debris and water before sealing ($60–$150)
- Putty knife / margin trowel — Applying hydraulic cement ($10)
- Hydraulic cement — Quikrete Hydraulic Water-Stop or Sika brands ($20–$40 per bag)
- Polyurethane crack injection kit — Emecole, Applied Technologies, or RadonSeal ($100–$300 per kit)
- Caulking gun — Needed for the injection ports and resin ($15)
- Concrete moisture meter — Lignomat, Tramex, or Wagner brands ($50–$150)
- Safety gear — N95 respirator, safety glasses, nitrile gloves (chemicals + concrete dust are no joke)
- LED work light — Most basements have terrible lighting ($30)
How to Fix a Leaking Basement from the Inside — Step-by-Step
Step 1: Stop Active Surface Leaks with Hydraulic Cement
For active leaks pushing through a visible crack or hole, hydraulic cement sets in 3 to 5 minutes and physically expands as it cures, plugging the opening even while water is actively flowing.
How to apply:
- Widen the crack slightly with a cold chisel to create a V-groove (3–5mm deep). This gives the cement something to grip.
- Clean thoroughly with a wire brush. Vacuum out all loose material.
- Mix hydraulic cement in small batches — it sets in minutes. Use the ratio on the bag.
- Press firmly into the crack with a putty knife. Hold pressure for 2 to 3 minutes until set.
- Smooth the surface and let cure for 24 hours before painting or sealing further.
Cost: $20–$40 per bag (covers approximately 6–10 linear feet of hairline cracks).
Critical limitation: Hydraulic cement is a temporary fix. It seals the surface but doesn’t address the underlying water pressure. Water typically finds a new path within months to a few years. Use it as a stop-gap while you plan a permanent repair.
Step 2: Inject Foundation Cracks (Polyurethane or Epoxy)
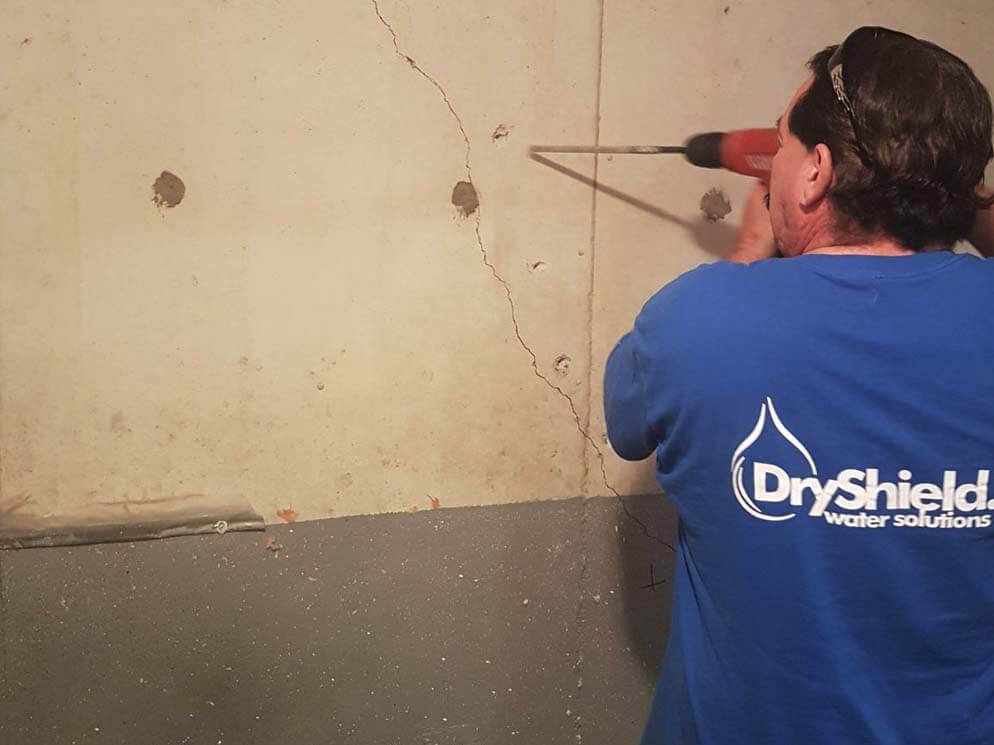
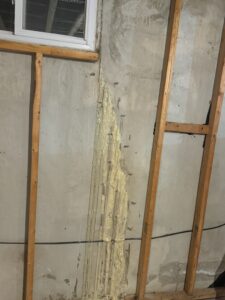
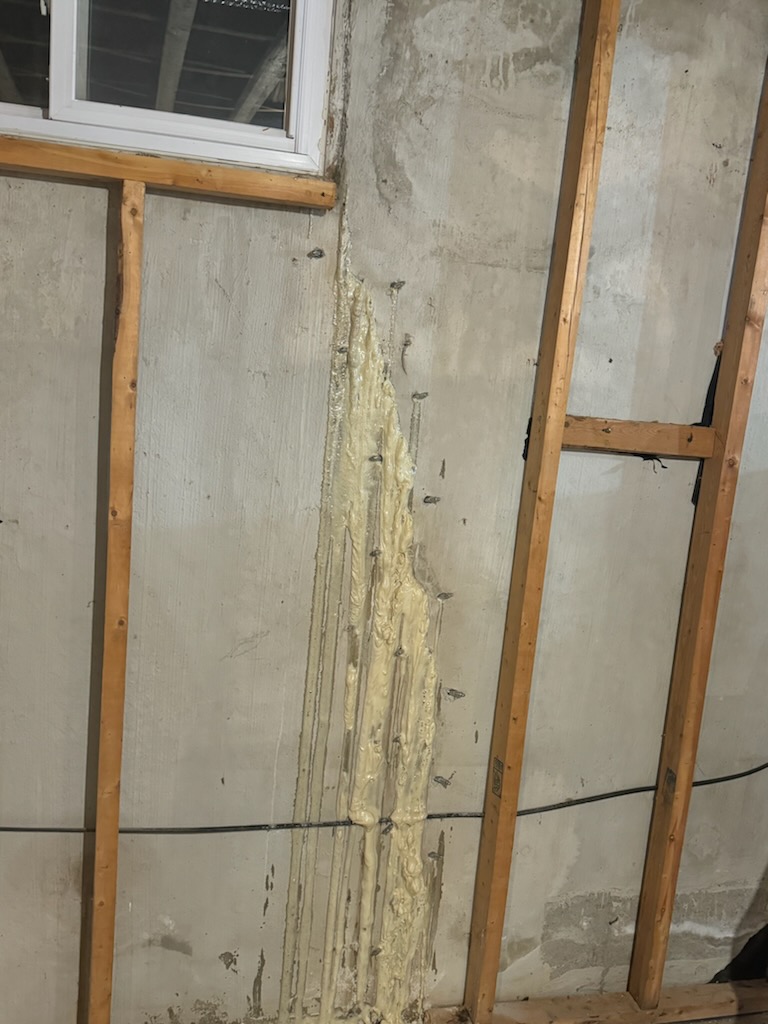
For foundation cracks leaking water, professional crack injection is the most reliable interior repair. The resin penetrates the full thickness of the wall (typically 8–10 inches) and seals the crack from the inside surface all the way to the outside soil-facing surface.
Polyurethane Injection — Best for Active Leaks
Polyurethane resin remains flexible after curing and expands up to 20 times its initial volume when it contacts water. This means it actively fills voids and conforms to irregular crack profiles. Polyurethane works on wet, actively-leaking cracks — water doesn’t interfere with the seal.
- DIY kit cost: $100–$300 per kit (covers 1 average crack)
- Professional cost: $750–$1,500 per crack (Dryshield includes a Lifetime Transferable Warranty on professionally injected cracks)
Epoxy Injection — Best for Structural Repair
Epoxy is more rigid and creates a bond stronger than the surrounding concrete. Use epoxy when the crack is structural (not just a leak path) and you need to restore the wall’s load-bearing capacity. Epoxy requires a dry crack to bond properly.
- DIY: Not recommended — epoxy is unforgiving and structural repairs need professional assessment
- Professional cost: $750–$2,500 per crack
Critical Warning: Block Foundations Cannot Be Crack-Injected
If your foundation is cinder block, concrete block, or stone, injection will not work. The blocks are hollow and water travels laterally through the cores. Block foundation walls require a full interior waterproofing system, not crack injection. We see homeowners waste money on injection attempts in block basements every year — don’t be one of them.
Step 3: Install an Interior Weeping Tile (Sub-Floor Drainage) System
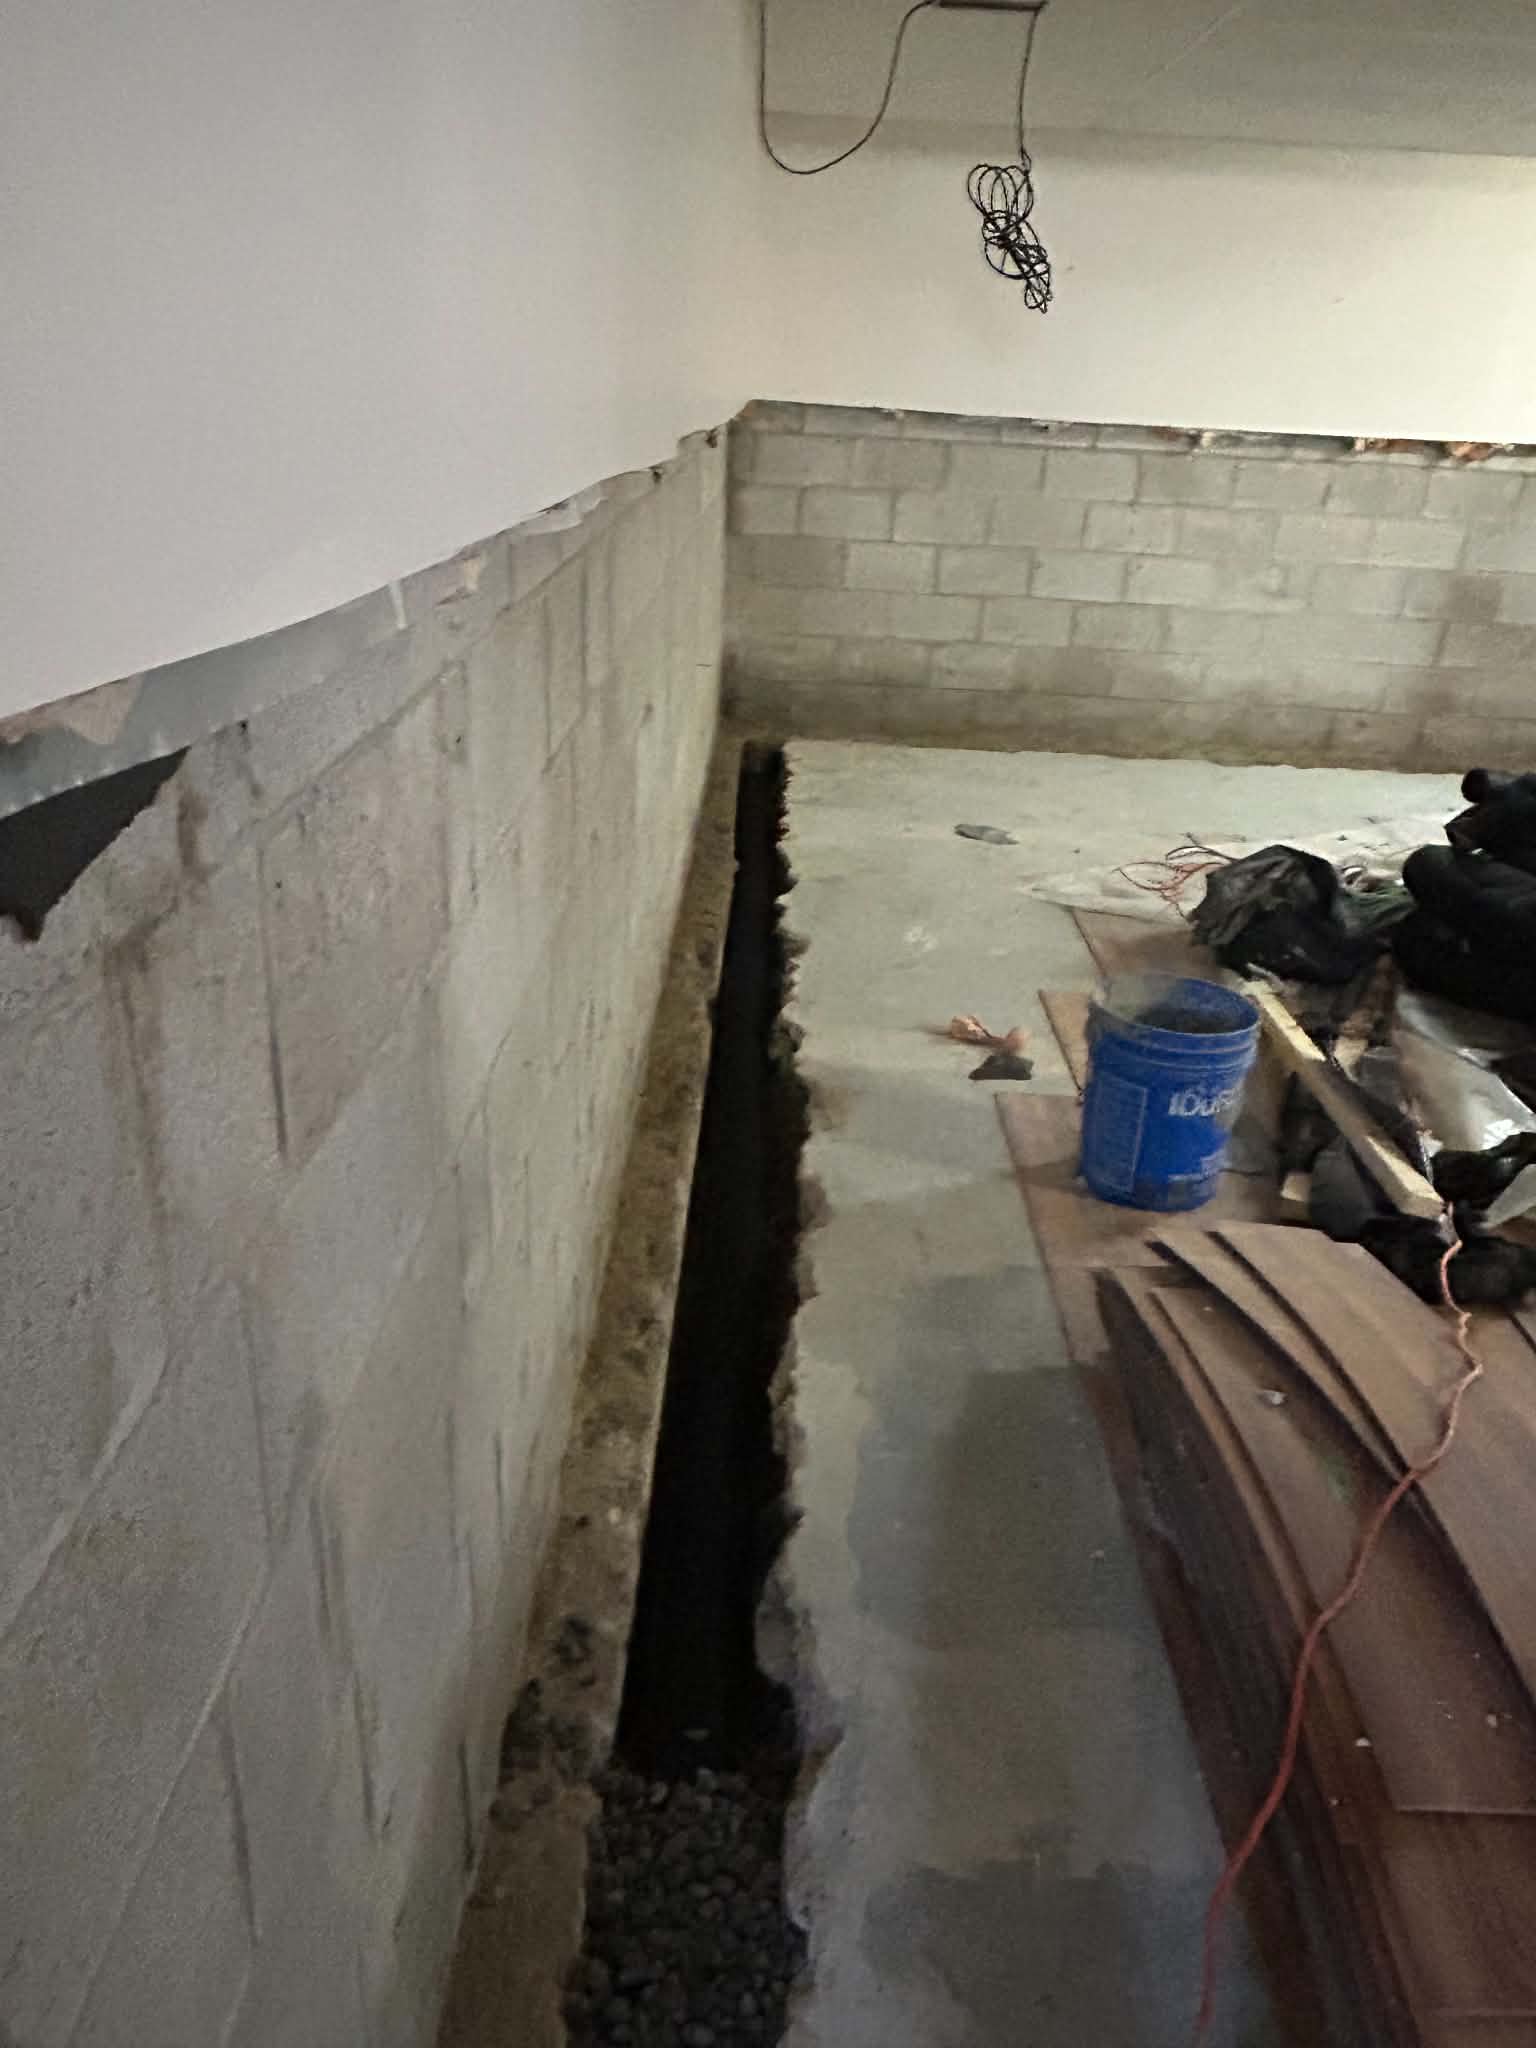
If water is coming up through the floor/wall joint, pooling on the floor, or seeping through multiple areas of a block foundation, hydraulic cement and crack injection won’t solve the problem. You need interior weeping tile — also called sub-floor drainage or interior French drain.
How interior weeping tile works:
- Concrete is broken out along the perimeter wall, 4 to 6 inches inside the wall and approximately 6 to 8 inches deep.
- A perforated 4-inch pipe is placed in the trench, sloped toward a sump pit (1 inch drop per 10 feet of pipe).
- The pipe is wrapped in filter sock fabric to prevent silt clogging.
- The pipe connects to a sump pit at the lowest point of the basement, which houses a sump pump.
- Clean drainage stone is placed around the pipe.
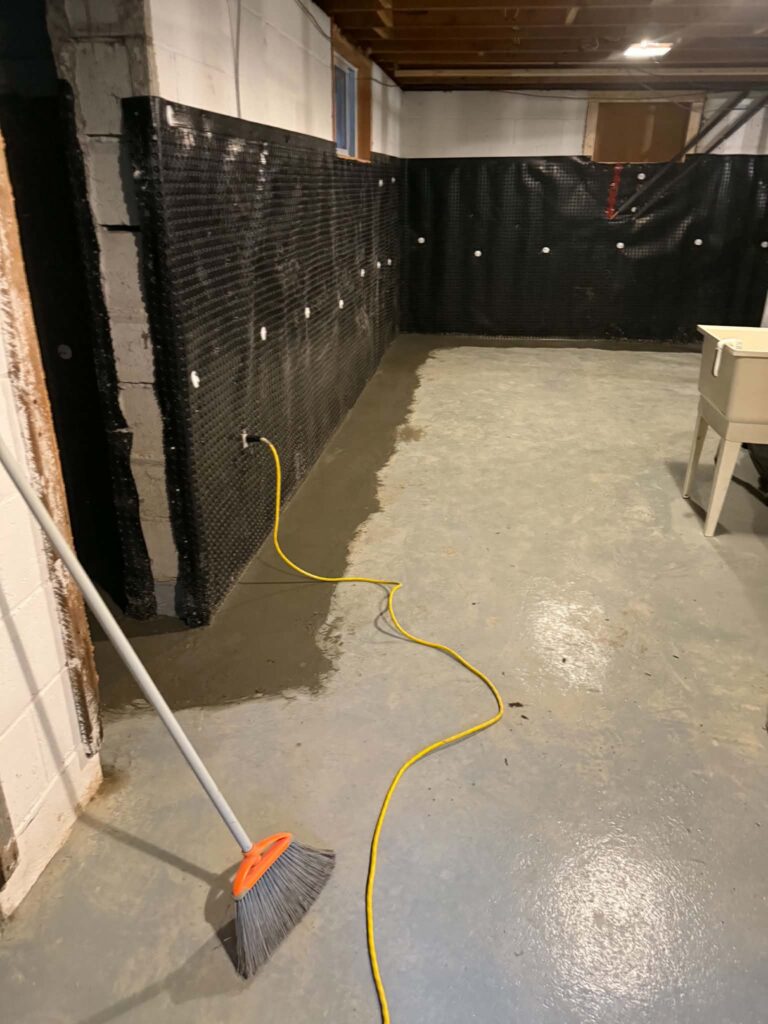
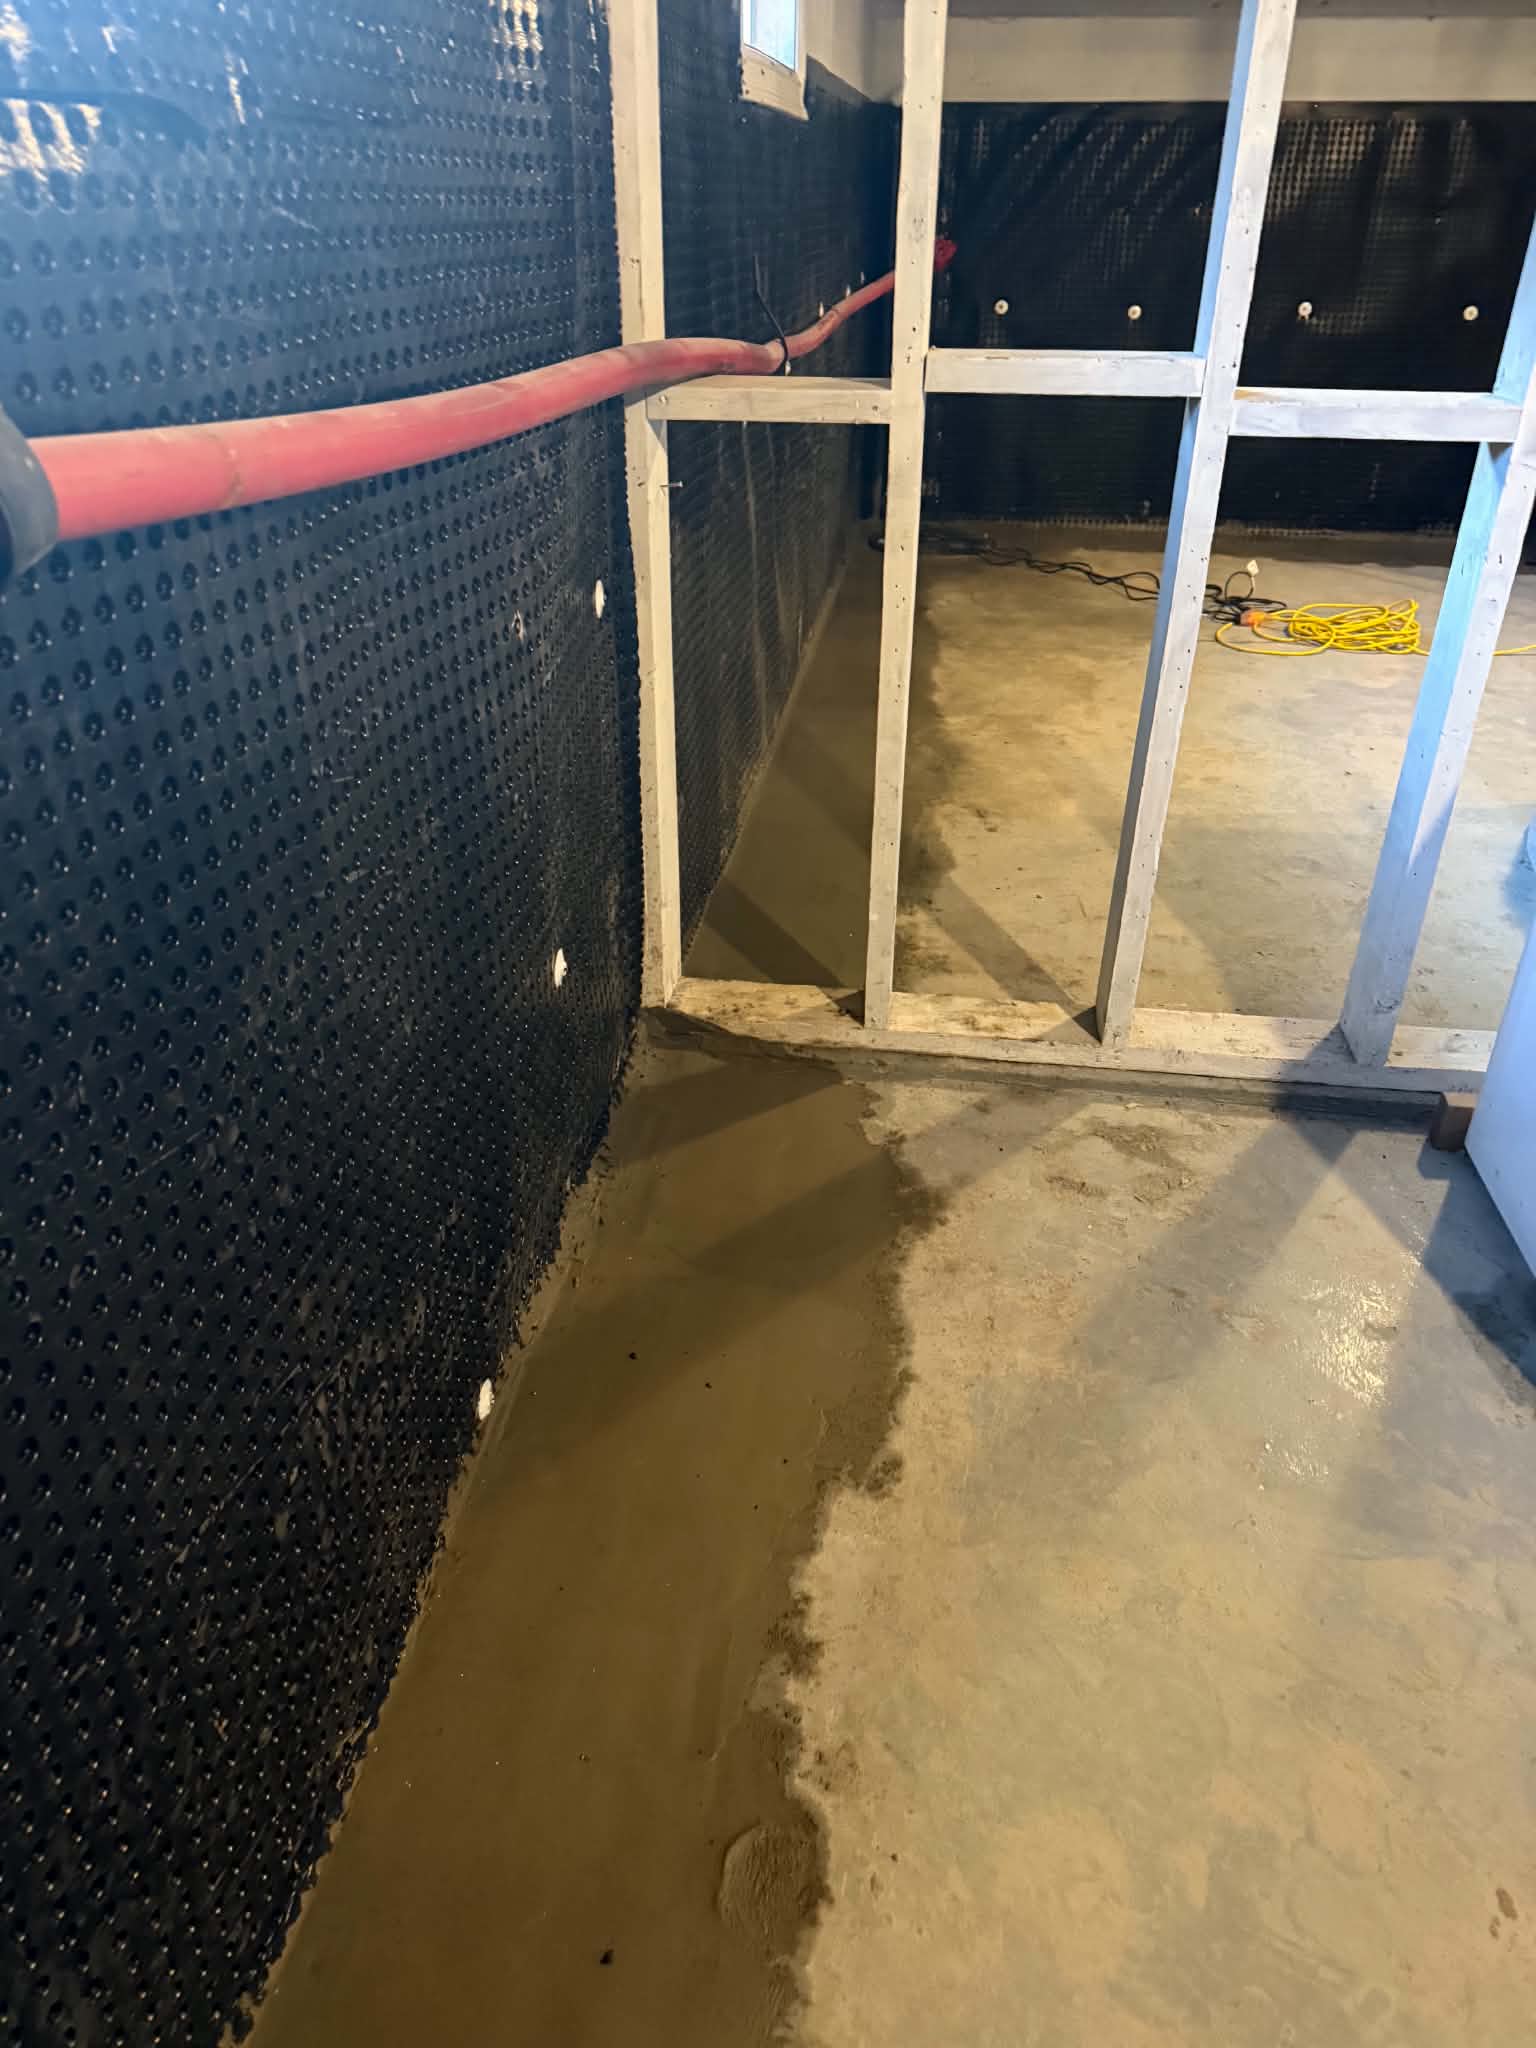
- A vapour barrier dimple membrane is run from the trench up the wall to direct any wall seepage down into the new drainage system.
- Fresh concrete is poured over the new system, flush with the existing floor.
Water that would have been forced up through the floor/wall joint now flows harmlessly into the new drainage system and is pumped safely away from the home.
Cost in the GTA (2026): $90 to $150 per linear foot for professional installation. A typical 30-foot wall costs $2,000 to $4,000. A full perimeter (~150 ft for an average home) runs $2,000 to $20,000.
Why this isn’t a DIY job: Cutting concrete with a wet saw, sloping pipe precisely, installing the dimple membrane up the wall, sizing the sump pit correctly, and pouring new concrete flush all require professional tools and experience. One mistake — pipe sloped the wrong way, sump pit too small, dimple membrane not properly tied in — and the entire system fails to keep your basement dry.
Step 4: Install or Upgrade Your Sump Pump (and Battery Backup)
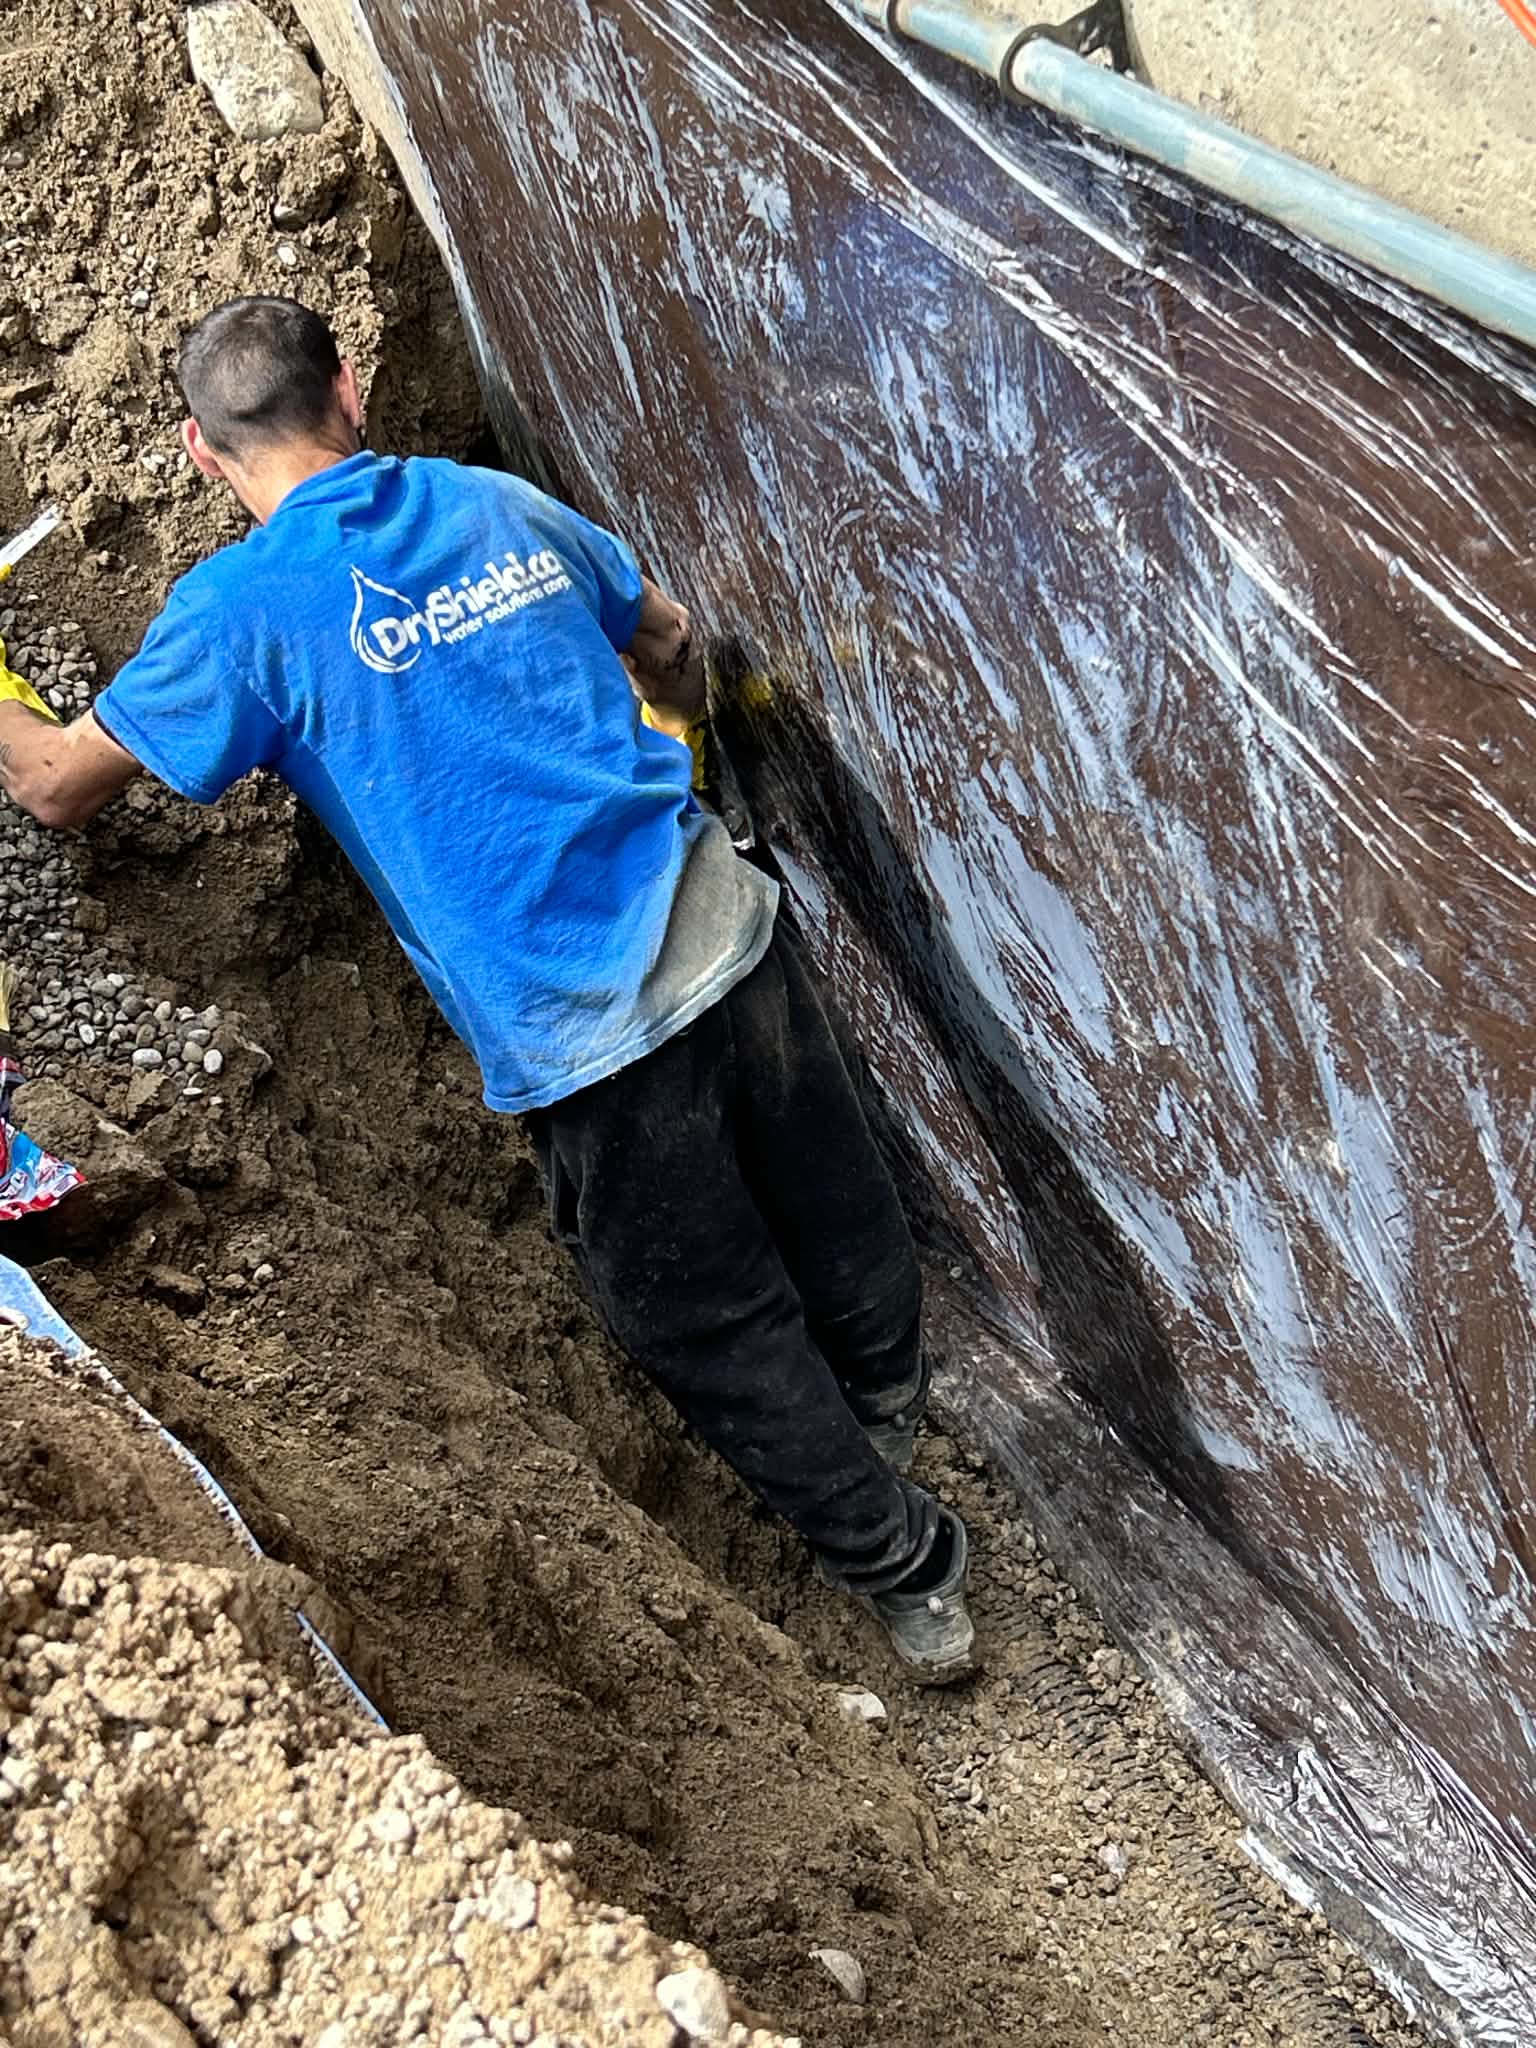
A sump pump is the heart of any interior drainage system. If you have functioning interior weeping tile but an old, undersized, or unmaintained pump, you will still flood eventually.
Specifications that matter:
- Pump capacity: 1/3 HP minimum for most GTA homes. Upgrade to 1/2 HP for high water tables (near Lake Ontario, Credit River, Don River, or any natural watercourse).
- Submersible vs pedestal: Submersible pumps last longer and run quieter. Almost always the right choice for finished basements.
- Float switch: Tethered or vertical. Tethered is cheaper but more prone to sticking; vertical is more reliable for narrow pits.
- Check valve: Mandatory. Prevents discharged water from flowing backward into the pit when the pump stops.
- Discharge line: Discharge at least 10 feet from the foundation, ideally to a storm drain or graded slope that carries water away. Never discharge into a sanitary sewer (illegal in Toronto and most municipalities).
Battery backup is essential, not optional. The exact storms that flood your basement also knock out power. Without a battery backup, your sump pump becomes a paperweight at the worst possible moment. Quality battery backups use marine deep-cycle batteries and provide 6 to 24 hours of pumping capacity. Many models also send a smartphone alert when running on battery — critical if you’re not home.
Maintenance: Test your sump pump quarterly by pouring a bucket of water into the pit. Listen for normal operation. Clean any debris from the pit annually. Replace the pump itself every 7 to 10 years before it fails.
Cost in the GTA: $1,500 to $3,500 for professional installation. Battery backup adds $300 to $1,000.
Step 5: Address Surface Water, Grading, and Window Wells
The cheapest, most overlooked fix in basement waterproofing. Before spending $10,000+ on interior systems, make sure you don’t have a $200 surface water problem.
Window wells: Most older homes have window wells without proper drainage. Water collects, freezes in winter, and seeps through the window frame. Install a window well drain that connects to your weeping tile system, or add gravel and a window well cover.
Gutters: Clean twice a year (spring after pollen drop, fall after leaf drop). Extend downspouts at least 6 feet from the foundation using rigid extensions or buried drain lines.
Grading: Soil should slope away from the foundation at minimum 1 inch per foot for the first 6 feet. Walk your perimeter after a hard rain — if puddles form within 6 feet of the foundation, you need to re-grade.
Driveways and patios: These often settle over time and slope back toward the house. Mud-jacking or replacement may be required.
Disconnect downspouts from foundation drains: In older Toronto homes, downspouts sometimes empty directly into the foundation weeping tile system, overloading it. The City of Toronto’s mandatory downspout disconnection program addressed this for many properties, but check yours.
Foundation-Type-Specific Guidance
The fix that works depends heavily on what your foundation is made of:
Poured Concrete (Most Modern Homes)
The most repair-friendly foundation type. Crack injection works perfectly. Interior weeping tile works perfectly. Exterior waterproofing works perfectly. Almost any leak in a poured concrete basement can be fixed reliably from the inside if needed.
Cinder Block / Concrete Block
Hollow blocks are the most challenging foundation type to waterproof from the inside. Water travels laterally through the block cores. Surface fixes (paint-on sealers, hydraulic cement on visible cracks) provide false hope — water just emerges elsewhere. Block foundations almost always need either: (a) full interior weeping tile with a wall-to-floor dimple membrane, or (b) exterior excavation and waterproofing.
Stone (Pre-1940 Homes)
Old stone foundations in neighborhoods like Cabbagetown, Riverdale, and Leslieville have irregular joints filled with mortar. The mortar deteriorates over time. Interior parging (a thin coat of mortar) can help cosmetically but rarely solves leaks. Most stone foundations need an interior weeping tile system. Exterior work is possible but requires extreme care to avoid undermining the stone.
When Interior Fixes Aren’t Enough — Choose Exterior Waterproofing
Interior waterproofing solves the symptom (water in your basement) but not the cause (water against your foundation). For some situations, only exterior waterproofing provides permanent protection:
- Block foundations with widespread leakage on multiple walls
- Foundations showing efflorescence or ongoing concrete deterioration
- Finished basements where you can’t risk repeat failures
- Heritage homes where interior space is at a premium
- Properties planning major renovation or finishing soon
Exterior waterproofing excavates down to the footing, applies a rubberized elastomeric membrane to the foundation wall, installs new weeping tile in clean drainage stone, and backfills with proper grading. It stops water before it touches your foundation. Cost in the GTA: $100 to $250 per linear foot.
Interior vs Exterior Waterproofing — Side-by-Side Comparison
| Factor | Interior Waterproofing | Exterior Waterproofing |
|---|---|---|
| Stops water from entering basement | ✓ | ✓ |
| Prevents water from contacting foundation | ✗ | ✓ |
| Stops concrete deterioration / efflorescence | ✗ | ✓ |
| Disrupts landscaping, driveway, deck | No | Yes (full excavation) |
| Works on block foundations | Limited | Yes |
| Cost (full perimeter, average GTA home) | $13,500 – $22,500 | $15,000 – $37,500 |
| Lifespan | 15 – 30+ years | 20 – 50+ years |
| Permit required (GTA municipalities) | Usually no | If excavation > 1.2m |
| Best for | Targeted repair, semi-detached, budget jobs | Permanent protection, finished basements, block foundations |
At Dryshield we install both interior and exterior systems and they’re both backed by our Lifetime Transferable Warranty — the warranty stays with the home when you sell, adding tangible resale value.
How Much Does It Cost to Fix a Leaking Basement From the Inside? (2026 GTA Pricing)
| Repair Type | DIY Cost | Professional Cost (GTA) |
|---|---|---|
| Hydraulic cement (single small leak) | $20 – $50 | $200 – $500 |
| Polyurethane crack injection (per crack) | $100 – $300 (kit) | $750 – $1,500 |
| Epoxy crack injection (per crack) | Not recommended | $750 – $2,500 |
| Interior weeping tile (one wall, ~30 ft) | Not recommended | $2,700 – $4,500 |
| Interior weeping tile (full perimeter, ~150 ft) | Not recommended | $13,500 – $22,500 |
| Sump pump installation (1/3 to 1/2 HP) | $300 – $600 | $1,500 – $3,500 |
| Sump pump battery backup | $300 – $700 | $1,000 – $2,000 installed |
| Window well drain | $150 – $300 | $500 – $2,500 |
| Backwater valve installation | Not recommended | $1,500 – $2,800 |
| Exterior waterproofing (per linear foot) | Not applicable | $100 – $250 |
Note: Peel, York, Toronto, Halton, and Durham regions all offer subsidies for sump pumps and backwater valves. Dryshield can help you apply.
Will Homeowners Insurance Cover Basement Leak Repair?
Generally, no — but there are exceptions. Standard homeowners insurance covers sudden and accidental water damage (a burst pipe, a washing machine hose failure) but excludes gradual seepage from groundwater, hydrostatic pressure, or surface water.
What MIGHT be covered:
- Sewer backup (with sewer backup endorsement, common in Ontario policies)
- Sump pump failure damage (with sump pump failure endorsement)
- Water damage from a sudden foundation crack caused by an insured event (rare)
What’s typically NOT covered:
- Gradual leaks from foundation cracks
- Water through porous concrete
- Failed weeping tile
- Surface water seepage
- The cost of waterproofing itself (insurance pays for damage, not prevention)
Document everything if a sudden event occurs: photos, dates, weather records. If you’re claiming a covered event, file fast — most policies require notification within 30 days.
Seasonal Considerations — Best Time of Year for Each Repair
Interior crack injection: Year-round. No weather dependency. Often booked in winter when exterior work is impossible.
Interior weeping tile installation: Year-round. Indoor work. Some homeowners book in winter to be ready for spring melt.
Exterior waterproofing: Typically April through November in Southern Ontario. Frozen soil and freeze-thaw cycles make winter excavation impractical and unsafe. Emergency response for active flooding is available 365 days a year.
Sump pump installation: Year-round, but if your existing pump is questionable, replace BEFORE spring melt (March) and fall heavy rains (October).
Grading and downspout work: Spring after the ground thaws, or fall before freeze. Avoid frozen-ground attempts.
When to Call a Professional Instead of DIY
Stop DIY-ing and call a basement waterproofing professional if any of the following apply:
- Water is coming up through the floor or floor/wall joint (DIY can’t solve this)
- You have a cinder block or stone foundation
- Cracks are wider than 3mm, stair-stepping through block, or running horizontally
- Multiple walls are showing leaks or efflorescence
- DIY repairs have failed within 1–2 years
- You’re seeing structural signs: bowing walls, displaced blocks, separating drywall
- Your basement is finished or about to be finished
- You’ve had recurring mold issues
- Your home is older than 1980 and has never had waterproofing work done
Why Homeowners Across the GTA Trust Dryshield
- 25+ years of basement waterproofing experience across Toronto, the GTA, and Southern Ontario
- Over 300,000 linear feet of basement waterproofing completed
- $5,000,000 liability coverage — fully insured for your protection
- A+ BBB rating and 550+ verified customer reviews
- Lifetime Transferable Warranty — protection that stays with the home when you sell
- WSIB compliant and approved contractor for City of Toronto, Peel, and Halton basement flooding subsidies
- Free in-home inspections within 48 hours across the GTA
FAQ — Fixing a Leaking Basement from the Inside
Can I really fix a leaking basement from the inside?
Yes. Interior fixes — hydraulic cement, polyurethane crack injection, interior weeping tile systems, and sump pump installations — are all effective methods for stopping water from entering your living space. The right interior solution depends on where the water enters and why.
What is the cheapest way to fix a leaky basement?
The cheapest permanent fix is usually addressing surface water issues: cleaning gutters, extending downspouts, re-grading soil, and installing window well drains. These cost under $500 in materials. For wall cracks, DIY polyurethane injection kits run $100 to $300. Hydraulic cement is the cheapest at $20 to $50 but only works as a temporary fix.
How long does interior basement waterproofing last?
A properly installed interior weeping tile system with a quality sump pump lasts 15 to 30+ years. Crack injection is permanent for the crack treated, though new cracks can form elsewhere. Hydraulic cement is the shortest-lasting at typically months to a few years. Dryshield’s Lifetime Transferable Warranty covers our interior systems as long as you own the home — and transfers to the new owner when you sell.
Will interior waterproofing affect my home’s resale value?
Yes — positively. A documented, warrantied interior waterproofing system is a significant selling point. Home inspectors flag wet basements as deal-killers, and buyers walk away from undisclosed water damage. Dryshield’s Lifetime Transferable Warranty transfers to the new homeowner at no charge, providing concrete resale value.
Do I need a permit for interior basement waterproofing?
In most GTA municipalities (Toronto, Mississauga, Brampton, Vaughan, Markham, Oakville, Burlington), interior waterproofing and crack injection do not require a building permit. Exterior waterproofing requiring excavation deeper than 1.2 meters typically does. A licensed professional contractor handles all required permits.
Can interior waterproofing fix mold?
Interior waterproofing addresses the water source, but pre-existing mold requires separate remediation. The proper sequence is: (1) stop the water, (2) dry the affected area, (3) remediate any mold growth using a licensed mold remediation contractor or DIY for very small areas. Continuing waterproofing work while ignoring existing mold can spread spores throughout the home.
What’s the difference between interior and exterior waterproofing?
Interior waterproofing manages water after it enters by directing it to a sump pump and pumping it away. Exterior waterproofing stops water before it touches your foundation, using a rubberized membrane and drainage stone applied to the outside. Exterior is more durable and protects the foundation itself but is more expensive and disruptive to landscaping.
Will hydraulic cement stop a basement leak permanently?
No. Hydraulic cement seals the surface but doesn’t address the underlying hydrostatic pressure pushing water against your foundation. Water will eventually find another path. Use hydraulic cement as a temporary stop-gap while planning a permanent fix.
How do I know if my weeping tile has failed?
Common signs of failed weeping tile include: chronic water pooling in the same area after every rain, water emerging at the floor/wall joint, sump pit overflowing during light rainfall, and no improvement after addressing surface water issues. A camera inspection of the existing weeping tile (a service we offer) confirms the diagnosis.
Can foundation crack injection be done in winter?
Yes. Crack injection is an indoor process that doesn’t depend on weather. Many homeowners book crack repairs during winter when other types of waterproofing work aren’t possible.
How do I tell if a crack is structural or just shrinkage?
Shrinkage cracks are typically hairline (less than 1mm), vertical, and uniform in width. Structural cracks tend to be wider (3mm+), may run diagonally or horizontally, are often wider at one end, and may show displacement (one side of the crack is offset from the other). Any horizontal crack should be assessed by a structural engineer before injection.
Does interior waterproofing eliminate basement humidity?
Interior waterproofing dramatically reduces humidity by stopping the water source, but a properly sized dehumidifier is still recommended for finished basements. After waterproofing, basement humidity should consistently stay below 60%.
How much does it cost to waterproof a basement in Toronto?
Interior waterproofing costs $90 to $150 per linear foot in the Toronto market — typically $2,700 to $22,500 depending on whether you’re treating one wall or the full perimeter. Exterior waterproofing costs $100 to $250 per linear foot — typically $15,000 to $37,500 for a full perimeter. Crack injection alone runs $750 to $1,500 per crack.
Are there subsidies for basement waterproofing in the GTA?
Several municipalities offer subsidies for specific waterproofing components: City of Toronto Basement Flooding Subsidy Program (up to $3,400 for backwater valves, sump pumps, and downspout disconnections), Region of Peel Basement Flooding Subsidy Program (similar coverage for Mississauga, Brampton, Caledon), and Halton Region (Oakville, Burlington, Milton, Halton Hills). Dryshield is an approved contractor for all three and handles application paperwork.
Should I call a waterproofing company or a foundation contractor?
A specialized waterproofing company is the right call for ongoing leaks, weeping tile issues, sump pump installation, and crack injection. A foundation contractor or structural engineer is needed for visible structural damage (bowing walls, severe horizontal cracks, foundation settlement). Many situations need both — a structural engineer’s assessment followed by waterproofing remediation. Dryshield works alongside structural engineers on complex projects.
How long does a typical basement waterproofing job take?
Foundation crack injection: 2 to 4 hours. Interior weeping tile (full perimeter): 2 to 4 days. Exterior waterproofing (per wall): 3 to 5 days. Sump pump installation: 1 day. Most projects are scheduled within 1 to 2 weeks of the free in-home estimate.
Ready to Stop Your Basement Leak Permanently?
Our team brings over 25 years of basement waterproofing experience to every project. We’ve completed more than 300,000 linear feet of waterproofing, and every project comes with our Lifetime Transferable Warranty — protection that stays with your home when you sell.
If you’ve identified a leak you’re not confident DIY-ing — or if your interior fixes haven’t held — we offer free in-home inspections within 48 hours.
Get a Free Quote | Call 1-800-277-5411 | Book a Free Inspection