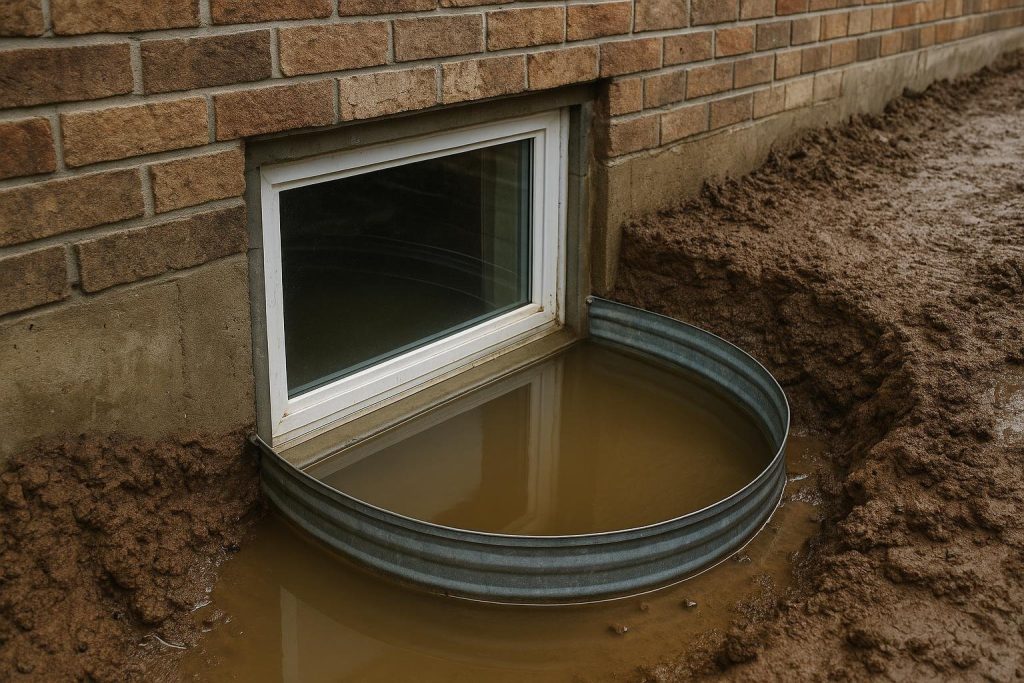
A basement window well leaking is almost always caused by one of three things: a blocked or missing drain at the base of the well, a failed window seal that lets surface water push straight through, or a grading problem that channels runoff directly toward the foundation. Identify which one you have before spending money on a fix, because the right repair for a clogged drain is completely different from the right repair for a cracked window frame.
How urgent is this?
Monitor: Damp well floor after heavy rain, no water inside yet, drain appears clear.
Act soon: Standing water in the well after every rain, minor seepage on the interior window sill, mild efflorescence on the surrounding block or concrete.
Act now: Water actively entering the basement, window frame bowing or rotting, mould visible on the interior wall below the window, or the well is filling faster than it drains.
Key Takeaways
- A blocked well drain is the most common cause and the easiest to fix yourself.
- Toronto’s heavy clay soil holds water against the foundation, turning a slow drain into a flood risk within minutes during a summer downpour.
- A leaking window well that goes unaddressed can saturate the surrounding soil and drive hydrostatic pressure into the foundation wall.
- Interior seepage at the window frame sometimes signals a foundation crack behind the window buck, not just a surface seal failure.
Confirm it is actually a basement window well leaking problem
Window well leaks show up in a specific pattern. Water appears on the interior wall directly below or beside the basement window, often after rain rather than during dry spells. The exterior well itself may hold standing water for hours after a storm. You might notice rust stains or mineral deposits on the window frame, or the wood buck around the window may feel soft when pressed.
The key distinguishing feature is location. The moisture is concentrated at the window opening, not spread across a long section of wall. If you press a dry cloth against the interior wall just below the window sill and it comes away damp within a few minutes of a rainstorm, the entry point is almost certainly the window assembly or the well itself.
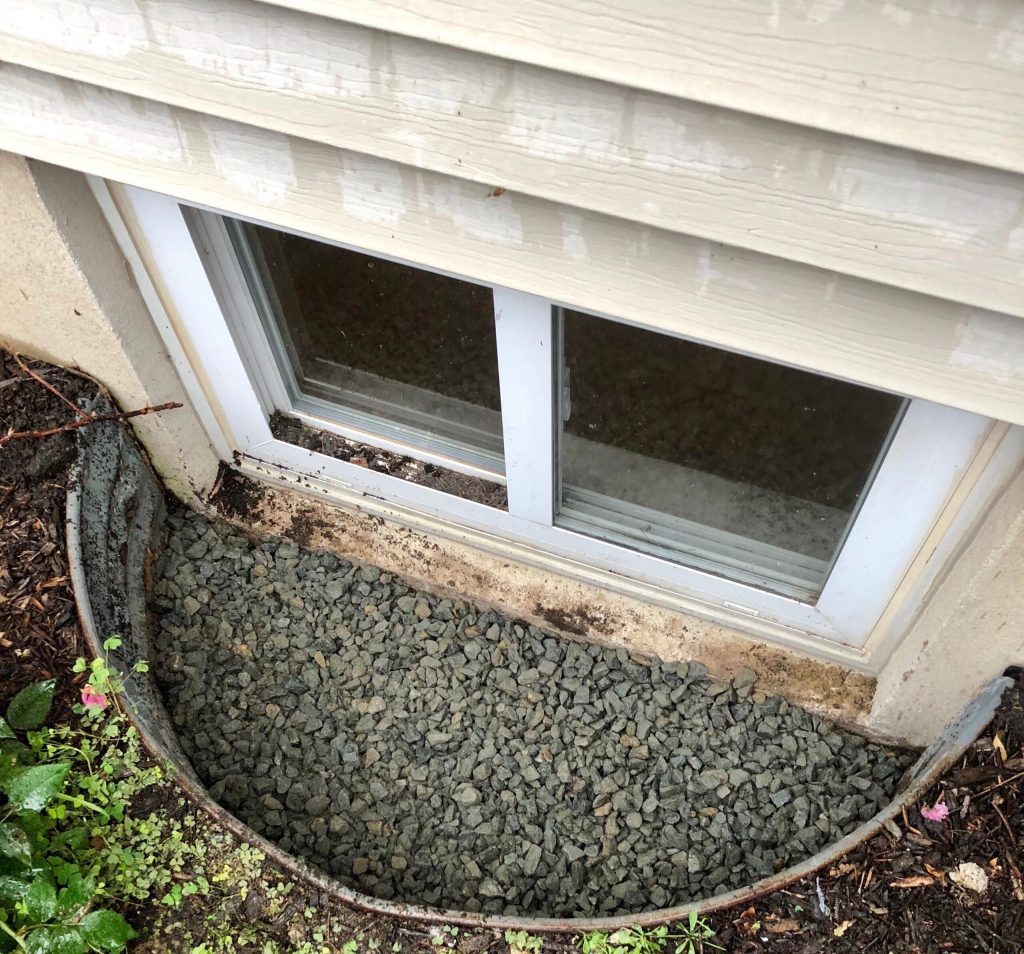
Check the well floor after the next rain. If water is pooling and staying there for more than an hour, the drain is either blocked, undersized, or was never installed. On older Toronto homes, particularly semi-detached and detached houses built before the 1980s, window wells were sometimes installed without any drain at all, relying entirely on gravel backfill that has since silted up.
Problems it gets confused with
A basement window well leaking is sometimes mistaken for a foundation wall crack that happens to be near the window. The difference: a crack leak usually produces a thin, vertical streak of moisture that follows the crack line, while a window well leak tends to wet a broader area around the frame and sill. Condensation on a cold window is another common confusion, but condensation appears on the glass and frame during humid weather regardless of rain, whereas a well leak tracks with rainfall events. Lateral water intrusion from a failed weeping tile system can also wet the wall near a window, but that type of seepage typically runs along the base of the wall and appears at the floor joint, not at window height.
Causes, ranked
1. Blocked or absent well drain
This is the most frequent cause across Toronto and the GTA. Window wells are supposed to have a gravel bed and a drain pipe that ties into the foundation drainage system or daylight. Over time, leaves, soil and debris block the drain opening. In heavy clay areas, the gravel itself becomes clogged with fine particles. When the drain fails, the well fills like a bucket and water finds the path of least resistance: the window frame. Telltale sign: standing water in the well that takes more than an hour to clear after rain stops.
2. Failed window seal or deteriorated caulking
The joint between the window frame and the foundation wall is sealed with caulk or a flexible membrane. That seal degrades over time, especially through Toronto’s freeze-thaw cycles. Once the seal cracks, even a small amount of water pooling in the well can push through under hydrostatic pressure. Telltale sign: visible gaps or cracked caulk around the window perimeter, water entry even when the well drain appears to be working.
3. Negative grading toward the foundation
If the soil around the well slopes toward the house rather than away from it, every rainstorm directs surface runoff straight into the well. This is common on older Toronto lots where decades of settling have reversed the original grade. Telltale sign: the well fills rapidly at the start of rain, before the drain could possibly be overwhelmed, and the surrounding soil is visibly lower than the foundation wall.
4. Undersized or improperly installed well
A window well that sits too low relative to the window sill, or that has no lip above grade, will collect water in any significant storm. Some wells were installed without the minimum 50 mm clearance above grade required by the Ontario Building Code. Telltale sign: the top edge of the well is at or below the surrounding soil level.
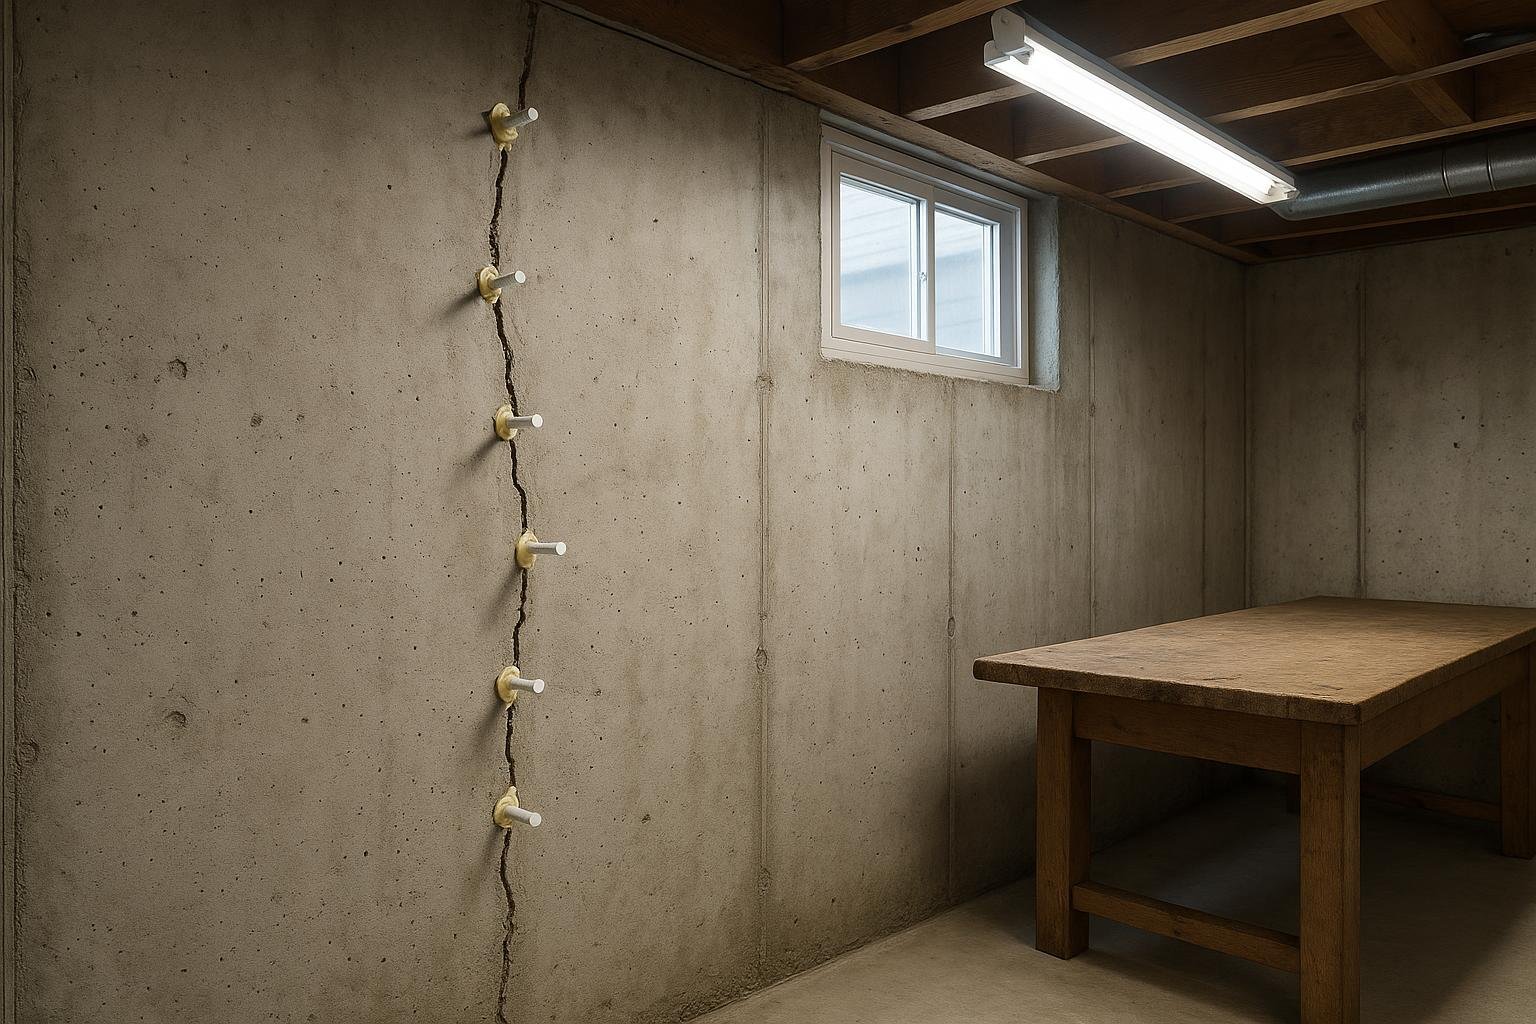
5. Foundation crack behind the window buck
Poured concrete foundations sometimes develop vertical shrinkage cracks that run directly behind or beside the window opening. Water in the well finds the crack and enters the basement. This cause is easy to miss because the crack is hidden by the window frame. Telltale sign: water entry even after the well drain is cleared and the exterior seal is renewed. A full basement leak assessment is needed to rule this out.
6. Sump pump or weeping tile failure nearby
If the weeping tile around the footing has silted up, groundwater has nowhere to go and hydrostatic pressure builds against the wall. The window opening is often the weakest point in that wall section. Telltale sign: seepage appears even during dry periods or long after rain has stopped, suggesting groundwater rather than surface water is the source.
Cause and solution table
| Cause | Telltale sign | Appropriate fix | Urgency |
|---|---|---|---|
| Blocked well drain | Standing water in well after rain | Clear drain, replace gravel bed, extend drain pipe if needed | Act soon |
| Failed window seal | Cracked caulk, water at frame perimeter | Remove old caulk, apply polyurethane sealant, replace window if frame is rotted | Act soon |
| Negative grading | Well fills instantly at start of rain | Re-grade soil to slope away at 5% over 1.5 m, extend downspouts | Act soon |
| Undersized well | Well top at or below grade | Replace with taller well unit, raise lip above grade | Monitor to Act soon |
| Foundation crack behind buck | Seepage persists after drain and seal repairs | Low-pressure polyurethane crack injection from interior | Act now |
| Failed weeping tile or sump | Seepage during dry periods | Interior weeping tile system to sump basin, or exterior excavation and membrane | Act now |
Use this table to match what you are seeing to the most likely root cause before committing to a repair. A drain blockage and a foundation crack can look similar from inside the basement, but the fixes are very different in scope and cost. If clearing the drain and resealing the frame does not stop the water, move down the table toward the structural causes.
What you can safely check yourself
- Inspect the well drain opening. Remove the well cover if there is one, clear leaves and debris from the drain grate, and pour a bucket of water into the well. It should drain within 10 to 15 minutes. If it does not, the drain is blocked or absent.
- Check the gravel bed. The bottom of the well should have at least 150 mm of clear stone. If you see compacted soil or fine silt, the drainage capacity is gone.
- Examine the caulk joint. Run your finger around the joint between the window frame and the foundation wall on the exterior. Any gap, crack or crumbling material is a water entry point.
- Check the grade. Stand back and look at the soil around the well. It should slope away from the house. Use a long level or a garden hose to confirm direction of flow.
- Look at the interior wall below the window. Efflorescence (white chalky deposits), staining, or soft drywall all indicate water has been entering for some time.
- Check downspout discharge. Confirm that downspouts are not discharging close to the window well. A downspout within 1.5 m of a well can overwhelm even a working drain.
What NOT to do
Do not fill the well drain with hydraulic cement or expanding foam to stop water from backing up. Blocking the drain traps water with nowhere to go and dramatically increases hydrostatic pressure against the foundation wall and window frame.
Do not apply interior waterproofing paint over a wet wall as a permanent fix. Masonry coatings can slow vapour transmission but they will not hold back water under pressure, and they can trap moisture in the wall, accelerating deterioration of the concrete or block.
Do not ignore a foundation crack behind the window buck. A crack that is letting in water will widen through seasonal freeze-thaw movement. What starts as a hairline can become a structural concern within a few seasons, particularly in Toronto’s clay-heavy soils where ground movement is significant.
How a professional diagnoses a basement window well leaking
A trained inspector starts outside, checking the well installation height relative to grade, the condition of the drain, the gravel bed depth, and the caulk joint around the frame. They will probe the soil around the well to assess drainage capacity and check whether downspouts or surface runoff are contributing.
Inside, the inspector examines the wall below and beside the window for efflorescence, staining patterns and any visible cracks. A moisture meter is used to map the wet zone and distinguish active seepage from historic staining. If a crack is suspected behind the window buck, the inspector may need to remove the interior trim to expose the foundation wall.
Where weeping tile failure is suspected, the inspector will assess the sump pit condition and, in some cases, use a camera to inspect the drain line. The Canada Mortgage and Housing Corporation (CMHC) notes at cmhc-schl.gc.ca that window well drainage is one of the most commonly overlooked moisture entry points in Canadian residential basements. A written scope with linear-foot pricing follows the inspection so you know exactly what work is proposed before any commitment is made.
Temporary vs permanent fixes
A temporary fix buys time but does not address the underlying cause. Clearing the drain and resealing the frame with fresh caulk is a reasonable short-term measure if you cannot schedule a full repair immediately. A well cover (a clear polycarbonate dome that fits over the well) reduces the volume of rain entering the well and can cut overflow events significantly during a wet season.
| Fix type | What it addresses | Typical lifespan | Approximate cost range |
|---|---|---|---|
| Clear drain and re-gravel | Blocked drain, poor drainage capacity | 3 to 7 years before re-silting | DIY to a few hundred dollars |
| Recaulk window frame | Failed seal at frame perimeter | 5 to 10 years depending on product | DIY to a few hundred dollars |
| Well cover installation | Reduces rain volume entering well | 10 or more years | Low, typically under $200 installed |
| Polyurethane crack injection | Foundation crack behind window buck | Long-term; flexible cure tolerates movement | $600 to $900 per crack (site-dependent) |
| Interior weeping tile to sump | Hydrostatic pressure, failed original tile | Permanent with maintained sump pump | Varies; depends on linear footage and access |
| Exterior excavation and membrane | Full perimeter waterproofing failure | Permanent | $6,000 to $9,000 for average Toronto semi/detached |
The cost ranges above come from DryShield’s own completed work across Toronto and the GTA. A single injected crack typically falls in the $600 to $900 range. Full exterior waterproofing of an average Toronto semi-detached runs roughly $6,000 to $9,000 depending on linear footage, excavation depth and site access. Every final figure depends on a site inspection. For a broader view of what different repairs cost, the basement leak repair cost guide for Toronto breaks down the main variables.
A single foundation crack injected with low-pressure polyurethane typically costs $600 to $900. That is the most cost-effective permanent fix when the crack, not the drain, is the true entry point.
Frequently asked questions
Why does my window well fill up so fast during Toronto storms?
Toronto’s heavy clay soil absorbs water slowly, so surface runoff concentrates quickly around any low point near the foundation. If the well drain is even partially blocked, the well can fill in minutes during a summer downpour. Extending downspouts away from the well and correcting the grade around it reduces the volume of water the drain has to handle.
Can I fix a basement window well leaking myself?
Clearing the drain, replacing the gravel bed and recaulking the frame are all reasonable DIY tasks. Anything involving the foundation wall itself, including crack injection or weeping tile work, should be handled by a licensed waterproofing contractor. Incorrect crack repair can trap moisture inside the wall and make the problem worse over time.
How do I know if there is a foundation crack behind my window?
If water continues to enter after you have cleared the drain and renewed the exterior seal, a crack behind the window buck is likely. A professional inspector can remove the interior trim to expose the foundation wall and confirm. Low-pressure polyurethane injection is the standard repair. You can also use the basement leak diagnostic tool to help narrow down the source before booking an inspection.
Does a window well cover actually help?
Yes, for surface water. A polycarbonate dome cover prevents rain from falling directly into the well, which reduces the load on the drain significantly. It does not address groundwater or a failed drain, and it will not stop water that is entering through a foundation crack. Think of it as a complement to proper drainage, not a substitute.
Will my home insurance cover a basement window well leaking situation?
Most standard Ontario home insurance policies exclude gradual water damage from seepage or drainage failure. Sudden and accidental water damage may be covered under an overland water endorsement, but coverage depends on your specific policy. For a detailed breakdown of what insurers typically cover, the Ontario home insurance and basement waterproofing guide explains the key distinctions.
How long does polyurethane crack injection last behind a window?
Low-pressure polyurethane injection cures flexible, which means it tolerates the seasonal foundation movement common in Toronto’s clay soils without re-cracking. When the crack is properly prepared and injected through the full depth of the wall, the repair is long-term. Epoxy injection is reserved for structural cracks where the wall needs to be re-bonded, not for the typical shrinkage crack found near a window opening.
What is the difference between interior and exterior repair for a basement window well leaking issue?
An interior repair, such as crack injection or an interior weeping tile system, manages water after it reaches the foundation wall. Exterior repair, which involves excavating to the footing and applying a rubberised membrane with dimpled drainage board and new weeping tile, stops water before it contacts the wall. Exterior work costs more but is the more complete solution where hydrostatic pressure is the root cause. The exterior vs interior perimeter waterproofing comparison covers both approaches in detail.
Older Toronto homes commonly have original weeping tile that is fully silted up. If your basement window well leaking keeps returning despite surface repairs, failed perimeter drainage is often the real cause.
If your window well is leaking and the basic checks have not solved it, a free on-site assessment from the DryShield Team will identify the exact entry point and give you a written scope with clear pricing. There is no obligation, and knowing the cause is always the right first step. Book a free assessment and get a straight answer about what your home actually needs.