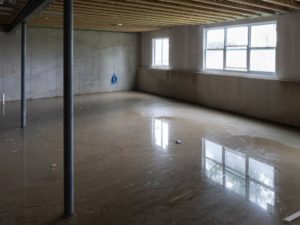
Shrinkage cracks in a new home foundation are one of the most common concerns Ontario homeowners encounter in the first one to five years after construction. These cracks form as poured concrete loses moisture and contracts during the curing process, and the majority are non-structural. However, some shrinkage cracks widen over time, admit water, or signal a secondary problem, so understanding the difference between a benign hairline and a crack that needs professional attention is essential for protecting your investment.
- Most shrinkage cracks in poured-concrete foundations are cosmetic and form within the first few years of a home’s life as concrete cures and dries.
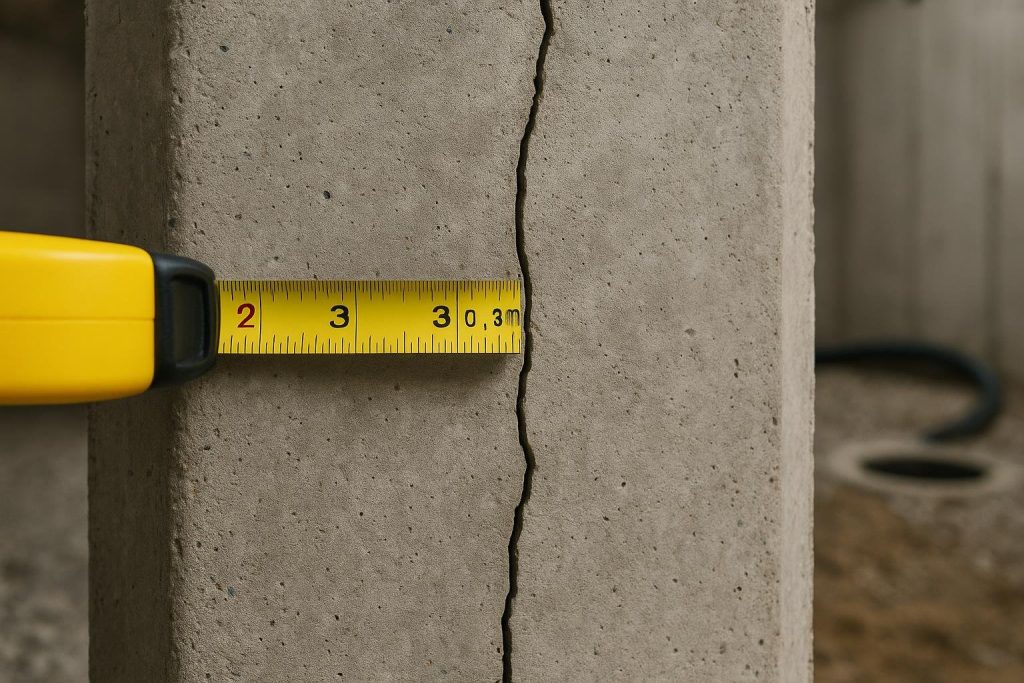
- A crack wider than 0.3 mm (roughly the thickness of a credit card edge), actively leaking, or growing in length or width warrants professional assessment.
- Polyurethane injection is the most common repair method for non-structural shrinkage cracks because it seals the crack and remains flexible as the concrete continues to move seasonally.
- Ontario’s freeze-thaw climate can widen an untreated hairline crack each winter, so early action reduces long-term repair costs.
- A structural engineer’s opinion is advisable before repair if the crack is horizontal, stair-stepped across block, or accompanied by wall bowing or displacement.
Definitions & scope
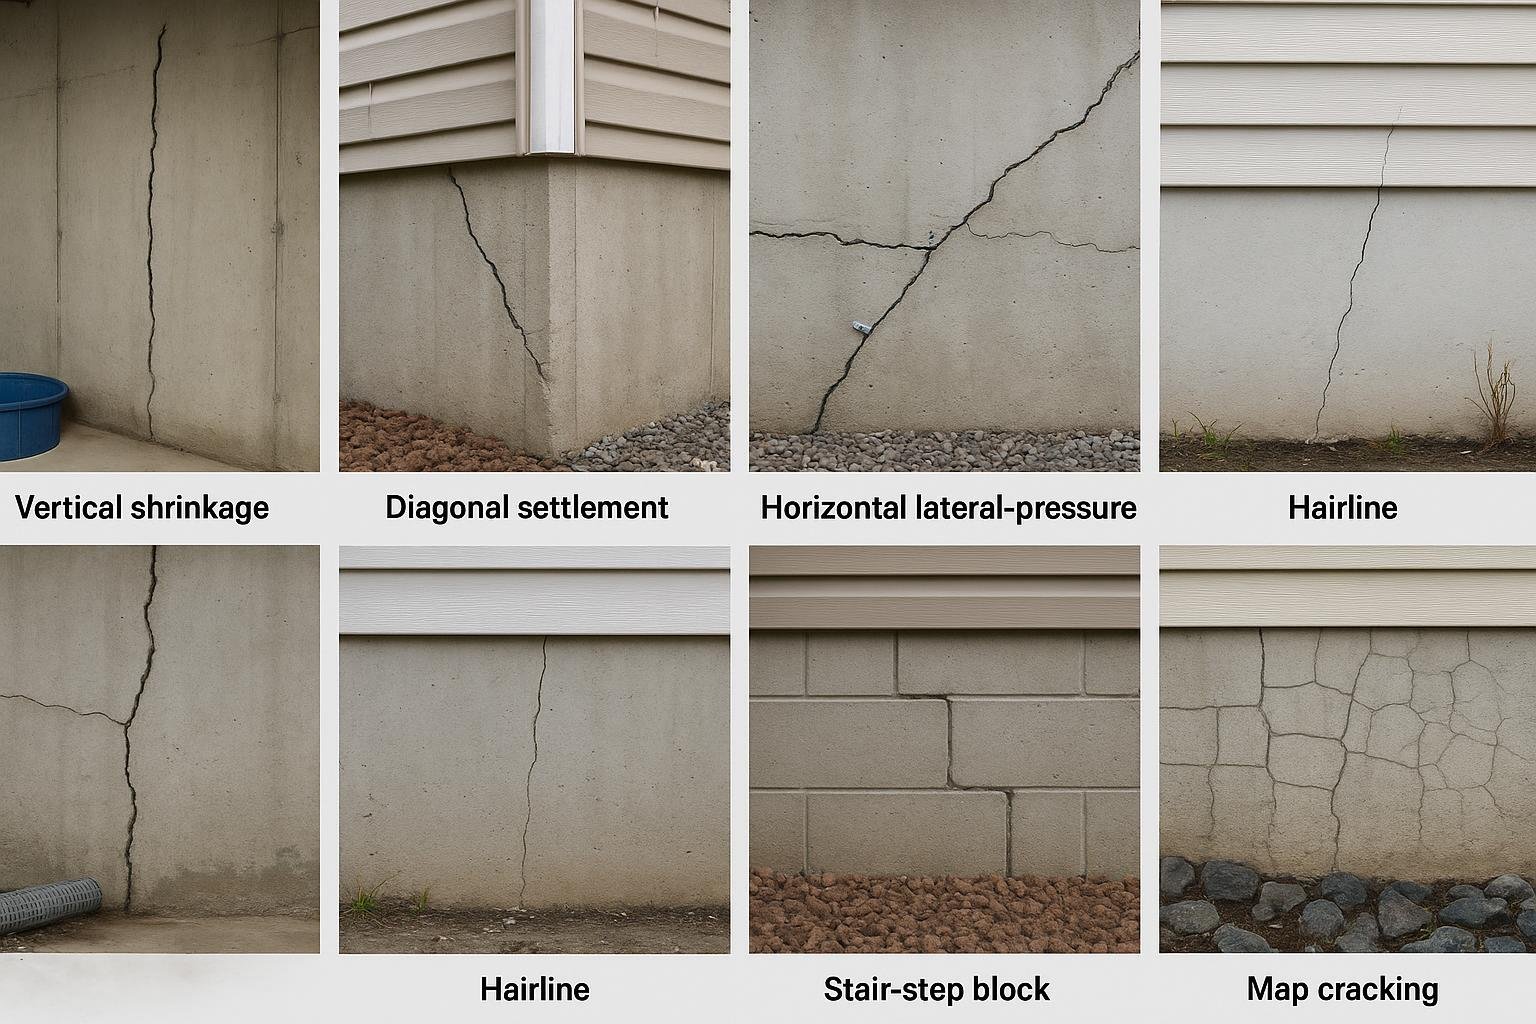
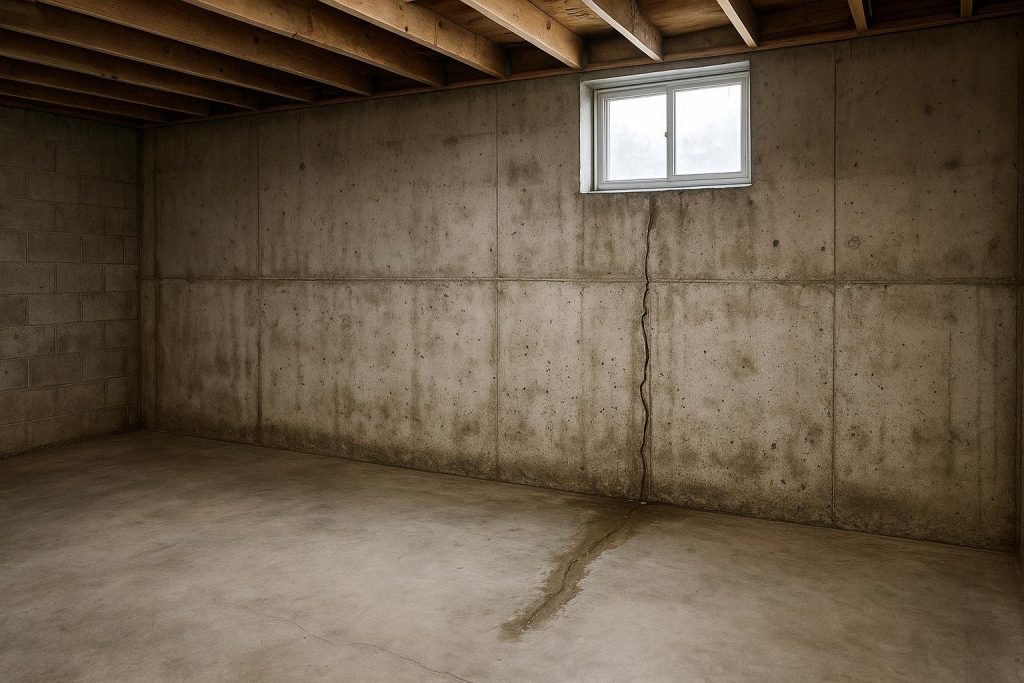
A shrinkage crack (also called a plastic shrinkage crack or drying shrinkage crack) forms when fresh concrete loses water faster than the hydration reaction can accommodate. As the paste matrix contracts, tensile stress builds and the concrete splits along the path of least resistance. In a poured-concrete foundation wall, this typically produces a vertical or slightly diagonal crack, often narrower at the top and bottom and widest near mid-wall.
If a shrinkage crack starts to let water in, see how we repair foundation cracks from inside the basement.
Shrinkage cracks are distinct from:
- Settlement cracks – caused by uneven soil movement beneath the footing, often diagonal and wider at one end.
- Lateral-pressure cracks – horizontal cracks driven by soil or hydrostatic pressure pushing inward on the wall.
- Freeze-thaw cracks – surface spalling or map cracking from repeated ice expansion in the concrete matrix.
The scope of this guide covers poured-concrete foundation walls in residential new construction across Ontario. Block or stone foundations crack differently and are addressed separately in our guide on why poured concrete cracks differently than cinder block.
Why this matters
Ontario’s climate creates conditions that turn a dormant hairline crack into an active leak faster than in milder regions. Each winter, water that has seeped into a crack freezes, expands by roughly nine percent in volume, and forces the crack slightly wider. By spring, the crack is marginally larger than it was the previous autumn. After several freeze-thaw cycles, what began as a hairline can become a visible gap that admits groundwater under hydrostatic pressure.
Hydrostatic pressure is particularly relevant in Ontario because much of the province sits on clay-rich glacial till that retains water after rain and snowmelt. Clay soils do not drain quickly, so water pressure against the foundation wall can persist for days or weeks after a heavy rain event. A crack that appears dry in summer may weep actively in April.
Beyond moisture, an untreated crack can affect a home’s resale value. Home inspectors routinely flag foundation cracks, and buyers may request repairs or price reductions. Understanding whether home insurance covers foundation cracks in Ontario is also relevant, as most standard policies exclude gradual water ingress through cracks.
For new-home buyers, the Tarion warranty program in Ontario provides coverage for certain foundation defects, but the scope and duration of that coverage depends on the defect classification. Homeowners should review their Tarion documentation and report cracks within the applicable warranty period. DryShield does not administer Tarion claims; this is a general factual note, not legal or warranty advice.
Your options for shrinkage cracks in a new home foundation in Ontario
Polyurethane crack injection
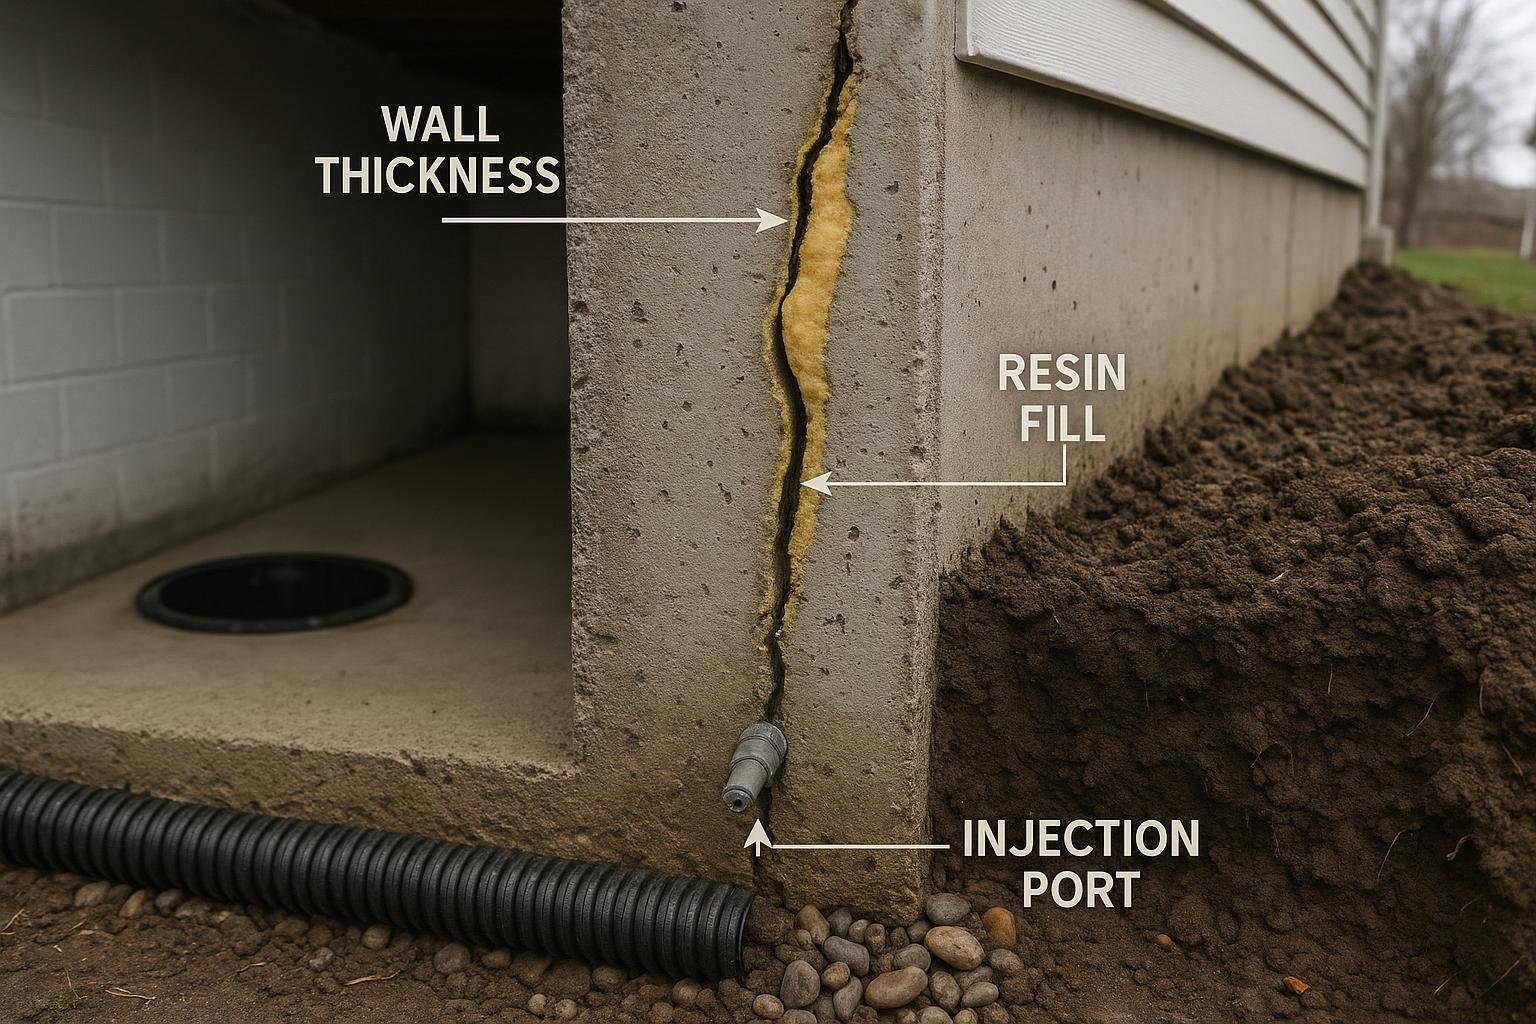
What it is: A two-part or single-component polyurethane foam or resin is injected under low pressure through ports drilled or surface-mounted along the crack.
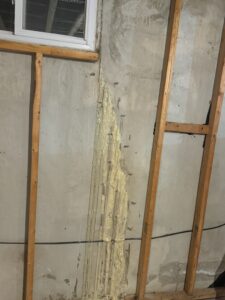
How it works: The resin expands as it cures, filling the full depth of the crack from the interior face to the exterior face of the wall. When moisture is present, many polyurethane formulations react with it and foam slightly, improving penetration into hairline voids. The cured material remains flexible, allowing it to accommodate minor seasonal movement without re-cracking.
Best for: Active or dormant non-structural shrinkage cracks in poured-concrete walls where flexibility is needed. This is the most widely used method for new-home foundation cracks in Ontario.
Limitations: Does not add structural strength. If the crack is caused by ongoing settlement or lateral pressure, injection alone will not address the root cause. Learn more in our polyurethane injection expert guide.
Epoxy crack injection
What it is: A two-part epoxy resin injected under low pressure, curing to a rigid, high-strength bond.
How it works: Epoxy bonds the two faces of the crack together, restoring much of the original tensile strength of the concrete. It is injected slowly through ports spaced along the crack.
Best for: Dry, stable cracks where structural restoration is the priority, such as a crack in a load-bearing wall that has fully stopped moving.
Limitations: Epoxy is rigid. If the crack continues to move seasonally, the repair can debond or the concrete can crack adjacent to the repair. Epoxy also does not perform well in wet or actively leaking cracks. See our comparison of epoxy vs. polyurethane crack injection for a detailed breakdown.
Carbon fibre straps or wall anchors
What it is: Carbon fibre reinforcement straps or steel wall anchors are fastened to the interior face of the wall to resist inward movement.
How it works: Straps are bonded vertically across a crack or along a bowing wall section. Anchors connect the wall to stable soil further from the foundation. Neither method fills the crack; they stabilize the wall against further movement.
Best for: Walls showing lateral displacement, bowing, or horizontal cracking where structural reinforcement is needed before or alongside crack sealing.
Limitations: Not a waterproofing solution on its own. Typically used in combination with injection or drainage systems. Adds cost and complexity. Requires professional structural assessment.
Exterior excavation and membrane waterproofing
What it is: The soil is excavated around the affected wall section, the crack is cleaned and filled, and a waterproof membrane is applied to the exterior face of the foundation.
How it works: By addressing the crack from the outside, the repair eliminates water contact with the wall before it can enter. A drainage board and weeping tile are typically installed or upgraded at the same time.
Best for: Cracks that have failed previous interior repairs, walls with multiple cracks, or new builds where the exterior drainage system was installed incorrectly.
Limitations: Significantly higher cost and disruption than interior injection. Landscaping, driveways, or decks adjacent to the wall may need to be removed. Learn more about exterior foundation waterproofing.
Interior drainage system with sump pump
What it is: A perimeter drainage channel is installed along the interior base of the foundation wall, directing any water that enters through cracks to a sump pit and pump.
How it works: Rather than stopping water at the crack, this system manages water that gets through, preventing it from reaching the basement floor. It is often combined with crack injection.
Best for: Basements with multiple entry points, high water tables, or where exterior excavation is not feasible. Also appropriate when a crack is one of several moisture sources.
Limitations: Does not seal the crack. Relies on the sump pump functioning continuously; a power outage without battery backup can result in flooding. Explore when injection works vs. when waterproofing is needed for guidance on choosing between these approaches.
Monitor and document (watchful waiting)
What it is: For very narrow, dry, stable hairline cracks, a professional may recommend monitoring the crack over one or two seasons before committing to repair.
How it works: Crack width is marked with a pencil line at each end and measured periodically. If the crack does not grow and admits no moisture, it may remain benign indefinitely.
Best for: Hairline cracks under 0.2 mm wide, dry, with no efflorescence or staining, in a wall with no other signs of movement.
Limitations: Requires discipline to monitor consistently. Ontario’s freeze-thaw cycles mean a crack can change status between autumn and spring. This is not a repair; it is a deferral strategy appropriate only for genuinely stable cracks.
Options compared
| Option | Best for | Typical considerations | Durability / limitations |
|---|---|---|---|
| Polyurethane injection | Non-structural, active or dormant cracks | Interior access only, low disruption, one visit | Flexible; accommodates movement; does not restore structural strength |
| Epoxy injection | Dry, stable, structural cracks | Crack must be dry; slower cure | High bond strength; rigid; can debond if crack moves |
| Carbon fibre / wall anchors | Bowing or displaced walls | Structural assessment required; higher cost | Stabilizes wall; does not waterproof |
| Exterior excavation + membrane | Repeated failures, multiple cracks, drainage upgrade | High disruption; landscaping impact; higher cost | Most comprehensive; addresses root cause from outside |
| Interior drainage + sump pump | High water table, multiple entry points | Manages water rather than stopping it; ongoing pump maintenance | Effective long-term if pump maintained; power-dependent |
| Monitor and document | Hairline, dry, stable cracks only | No cost; requires consistent monitoring | Not a repair; risk of crack widening undetected |
For the majority of shrinkage cracks found in Ontario new-home foundations, polyurethane injection is the most practical first response. It is minimally disruptive, can be completed in a single visit, and the flexible cured resin tolerates the seasonal movement that Ontario’s climate imposes on concrete. Epoxy is appropriate when a structural engineer has confirmed the crack is stable and structural restoration is the goal. Exterior excavation and interior drainage systems represent escalating responses for more complex situations where injection alone is insufficient.
 How to choose
Use the following decision framework to identify the most appropriate starting point. A professional inspection is always recommended before committing to any repair.
- Choose polyurethane injection if the crack is vertical or slightly diagonal, narrower than 6 mm, not accompanied by wall bowing or displacement, and is either dry or actively seeping water. This covers the large majority of shrinkage cracks in new poured-concrete foundations.
- Choose epoxy injection if a structural engineer has assessed the crack as stable, the crack is completely dry, and the goal is to restore tensile strength across the crack plane rather than simply seal it against water.
- Choose carbon fibre straps or wall anchors if the wall is bowing inward, if there is a horizontal crack at mid-wall height, or if a structural engineer has identified lateral movement. Injection may also be needed alongside this option.
- Choose exterior excavation if interior injection has been attempted and failed, if there are multiple cracks across a wall section, if the original exterior drainage was improperly installed, or if the homeowner is already undertaking significant landscaping work that exposes the foundation.
- Choose an interior drainage system if the water table is persistently high, if there are multiple moisture entry points that cannot all be individually sealed, or if the basement is being finished and a belt-and-suspenders approach is warranted. Review our guide on crack repair before finishing a basement before proceeding.
- Choose to monitor if the crack is a true hairline (under 0.2 mm), completely dry, shows no efflorescence or staining, and a professional has assessed it as stable. Mark the ends with a pencil and date, and re-examine each spring and autumn.
If you are unsure which category your crack falls into, use our foundation crack diagnosis tool or our basement leak diagnostic as a starting point.
Costs & timelines
No verified current price data has been supplied to this page. The following describes cost drivers only. For approximate current ranges, see our crack injection cost page and crack injection cost calculator.
| Rank | Cost driver | Why it matters |
|---|---|---|
| 1 | Repair method selected | Interior injection is the least expensive; exterior excavation is the most expensive, often by a large multiple |
| 2 | Number and length of cracks | Each crack requires its own ports and material; longer cracks require more ports |
| 3 | Wall thickness | Thicker walls require more resin to fill the crack through its full depth |
| 4 | Accessibility | Finished walls, stored items, or mechanical equipment blocking the crack face add labour time |
| 5 | Active water presence | Actively leaking cracks may require hydraulic cement or a two-stage process before injection |
| 6 | Structural complexity | If a structural engineer’s report is required, that fee is separate from the repair cost |
Timeline for polyurethane injection is typically a single visit of one to three hours per crack, with the resin curing sufficiently for normal use within 24 hours. Exterior excavation projects require multiple days and depend on soil conditions, weather, and the extent of drainage work involved. Interior drainage system installation typically takes one to three days depending on the perimeter length involved.
Risks & common mistakes
Understanding what can go wrong helps homeowners avoid costly errors when dealing with shrinkage cracks.
Misidentifying the crack type. Applying a shrinkage-crack repair to a crack caused by lateral soil pressure or settlement will not solve the underlying problem. A horizontal crack at mid-wall height is a warning sign of lateral pressure, not shrinkage. Always confirm the crack type before selecting a repair. Our guide on how to tell if a foundation crack is structural provides a detailed checklist.
Using hydraulic cement or surface patching as a permanent fix. Hydraulic cement and surface-applied sealants stop water temporarily but do not fill the crack through its full depth. As the concrete moves seasonally, the patch debonds and the crack reopens, often wider than before. This is one of the most common DIY mistakes on new-home foundations.
Delaying repair until the crack leaks. A dry crack is easier and less expensive to inject than an actively leaking one. Waiting until water appears means the crack has already widened enough to admit moisture under hydrostatic pressure, and secondary damage such as efflorescence, mould, or insulation saturation may have begun. See our page on efflorescence on basement walls for signs that water has already been moving through a crack.
Ignoring grading and drainage. A crack repair that is not accompanied by attention to surface drainage around the home will be under constant stress. Soil that slopes toward the foundation, blocked eavestroughs, or downspouts discharging against the wall all increase hydrostatic pressure on the repaired crack. Repair the crack and address the drainage.
Assuming the Tarion warranty covers all cracks. Tarion warranty coverage for foundation cracks in Ontario is subject to specific definitions, timelines, and thresholds. Not every crack qualifies. Homeowners should document cracks with photographs and dates and submit warranty claims within the applicable period. DryShield does not administer Tarion claims.
Finishing the basement before repairing cracks. Installing drywall, insulation, or flooring over an unrepaired crack traps moisture, promotes mould growth, and makes future repair far more expensive. Repair all cracks before any basement finishing work begins.
How the process works
The following steps describe a typical interior polyurethane crack injection repair for a shrinkage crack in a new poured-concrete foundation wall.
- Inspection and crack mapping. A technician examines the crack, measures its width and length, checks for active moisture, and confirms the crack type. The wall is checked for bowing or displacement that would change the repair approach.
- Surface preparation. The crack face is cleaned of dust, efflorescence, and any previous patch material. If a surface sealant has been applied previously, it is removed so the injection ports can be placed directly over the crack.
- Port placement. Injection ports are surface-mounted or drilled at intervals along the crack, typically every 150 to 300 mm depending on wall thickness and crack width. Ports are placed closer together for narrower cracks.
- Surface sealing. The crack face between ports is sealed with an epoxy paste to contain the injected resin and direct it into the crack rather than out the front face of the wall.
- Resin injection. Polyurethane resin is injected at low pressure through each port in sequence, starting at the lowest port and working upward. The technician monitors each port for resin breakthrough at the adjacent port, confirming the crack is filled through its depth.
- Cure and port removal. The resin is allowed to cure. Ports are removed and the surface is cleaned. The repair is typically complete in one visit.
- Post-repair review. The technician confirms coverage and discusses any warranty terms. DryShield offers a lifetime transferable warranty on qualifying crack injection repairs.
Frequently asked questions
Are shrinkage cracks in a new home foundation normal in Ontario?
Yes. Shrinkage cracks are a predictable result of the concrete curing process and are common in poured-concrete foundations across Ontario. The Portland Cement Association notes that drying shrinkage is an inherent property of concrete. Most new homes develop at least one vertical shrinkage crack within the first two to five years. The presence of a crack is not automatically a defect, but its width, orientation, and behaviour over time determine whether repair is needed.
How wide does a shrinkage crack need to be before I should repair it?
A commonly cited threshold in the industry is 0.3 mm, roughly the thickness of a credit card edge. Cracks narrower than this and showing no moisture, staining, or growth may be monitored. Cracks at or above this width, or any crack that is actively leaking or growing, should be assessed by a professional. Width alone is not the only factor; a crack that is dry but growing in length also warrants attention.
Can I inject a shrinkage crack myself?
DIY polyurethane injection kits are available, but achieving full-depth penetration through a foundation wall requires controlled low-pressure equipment and experience with port spacing. Incomplete injection leaves voids that allow water to bypass the repair. Surface patching with hydraulic cement or caulk is not a substitute for through-wall injection. For a crack in a new home’s foundation, professional repair is recommended to avoid voiding any applicable warranty coverage.
Will my Tarion warranty cover shrinkage cracks?
Tarion’s warranty program covers certain foundation defects in new Ontario homes, but coverage depends on the defect classification, its severity, and when it is reported. Not all shrinkage cracks meet the threshold for a warranted defect. Homeowners should photograph and document cracks, then submit a warranty service request within the applicable period. DryShield does not administer Tarion claims; consult your builder and Tarion directly for warranty-specific guidance.
What does efflorescence near a crack mean?
Efflorescence is the white chalky deposit left when water carries dissolved salts through concrete and evaporates at the surface. Its presence near a crack confirms that water has been moving through the crack, even if the crack appears dry at the time of inspection. It is a reliable indicator that the crack is or has been an active water pathway and should be sealed. See our detailed page on removing efflorescence from basement walls.
How does Ontario’s freeze-thaw cycle affect shrinkage cracks?
Water that enters a crack freezes in winter and expands by approximately nine percent in volume, exerting pressure on the crack walls and forcing them slightly apart. Over multiple freeze-thaw cycles, a hairline crack can widen measurably. Ontario typically experiences many freeze-thaw cycles per winter season, particularly in the shoulder months of November and March. This is why a crack that appears stable in summer may be noticeably wider by spring.
Should I repair a shrinkage crack before finishing my basement?
Yes, always. Installing insulation, vapour barrier, framing, and drywall over an unrepaired crack traps any moisture that enters, creating conditions for mould growth and structural deterioration of the framing. Repair costs also increase significantly once a basement is finished, because the wall must be exposed before injection can proceed. Our guide on crack repair before finishing a basement covers this in detail.
Is a vertical crack more serious than a diagonal crack?
In a poured-concrete foundation, both vertical and diagonal cracks are commonly caused by shrinkage or minor settlement and are generally non-structural. Horizontal cracks are the most serious orientation because they indicate lateral soil or hydrostatic pressure pushing inward on the wall. A diagonal crack that is significantly wider at one end than the other may indicate differential settlement and warrants a structural assessment. Use our GTA foundation crack troubleshooting guide for orientation-specific guidance.
How long does a polyurethane injection repair last?
A properly executed through-wall polyurethane injection repair, where the resin fully penetrates the crack depth, is designed to be a long-term solution. The cured resin remains flexible and bonded to the concrete. DryShield backs qualifying crack injection repairs with a lifetime transferable warranty. However, if the underlying cause of the crack, such as ongoing settlement or unresolved drainage issues, is not addressed, new cracks may form adjacent to the repair.
When should I call a structural engineer instead of a waterproofing contractor?
Call a structural engineer first if the crack is horizontal, if the wall is visibly bowing or displaced, if the crack is accompanied by floor heaving or door and window misalignment, or if the crack has grown rapidly. A waterproofing contractor can seal a crack, but only a licensed structural engineer can assess whether the wall’s load-bearing capacity has been compromised. In many cases, both professionals are involved: the engineer assesses and specifies, and the contractor executes the repair.
If you have found a crack in your new home’s foundation and are unsure of its severity or the right repair approach, DryShield’s team is available to assess the crack and recommend an appropriate solution. With more than 25 years serving Toronto, the GTA, and Ontario cottage country, we can help you distinguish a benign shrinkage crack from one that needs prompt attention. Visit our foundation crack repair services page or use our basement leak diagnostic tool to get started.