Leaking snap tie holes in a foundation wall are one of the most predictable entry points for basement water: the small steel rods used to hold concrete formwork apart leave a cone-shaped void through the wall when snapped off, and that void becomes a direct channel for groundwater under hydrostatic pressure. If you see a wet spot, rust stain, or dripping water at a regular grid of small circular marks on your poured-concrete wall, snap tie penetrations are the most likely explanation. Stop any active drip with a hydraulic cement plug as a first step, then arrange a professional assessment to determine whether injection sealing is needed.
Tie-hole leaks are sealed much like wall cracks; see our basement crack repair service.
How urgent is this?
- Monitor: A faint rust stain or slight efflorescence around a tie hole with no visible moisture. Check after every heavy rain.
- Act soon: Intermittent dampness or a slow seep at one or more holes after rain or snowmelt. Schedule a professional inspection within a few weeks.
- Act now: Active dripping, a steady stream, or multiple holes weeping simultaneously. Seal the active leak with hydraulic cement immediately and call a waterproofing contractor the same day.
- Snap tie holes are designed-in weak points in poured-concrete walls; every poured foundation has them.
- The outer plastic cone is removed at forming, leaving a tapered void that is rarely filled adequately at construction.
- Hydrostatic pressure from saturated soil drives water through the path of least resistance, which is often these voids.
- Polyurethane crack injection is the standard professional repair; it fills the void completely and bonds to surrounding concrete.
- Ignoring active snap tie leaks accelerates corrosion of the embedded rod stub, widens the void, and promotes mould growth on interior surfaces.
Confirm it is actually this
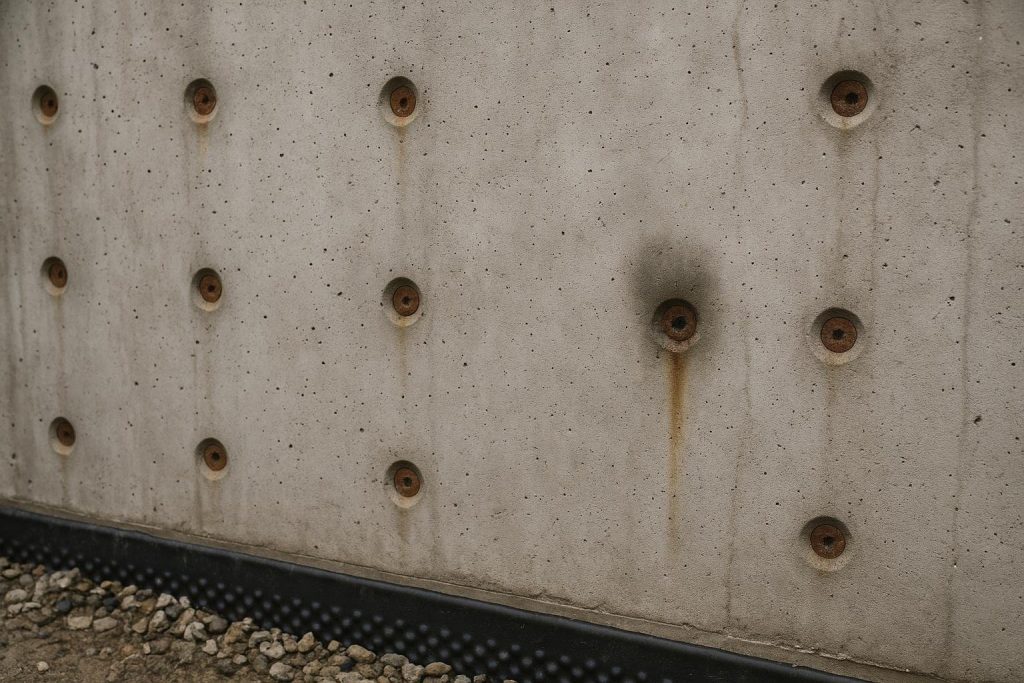
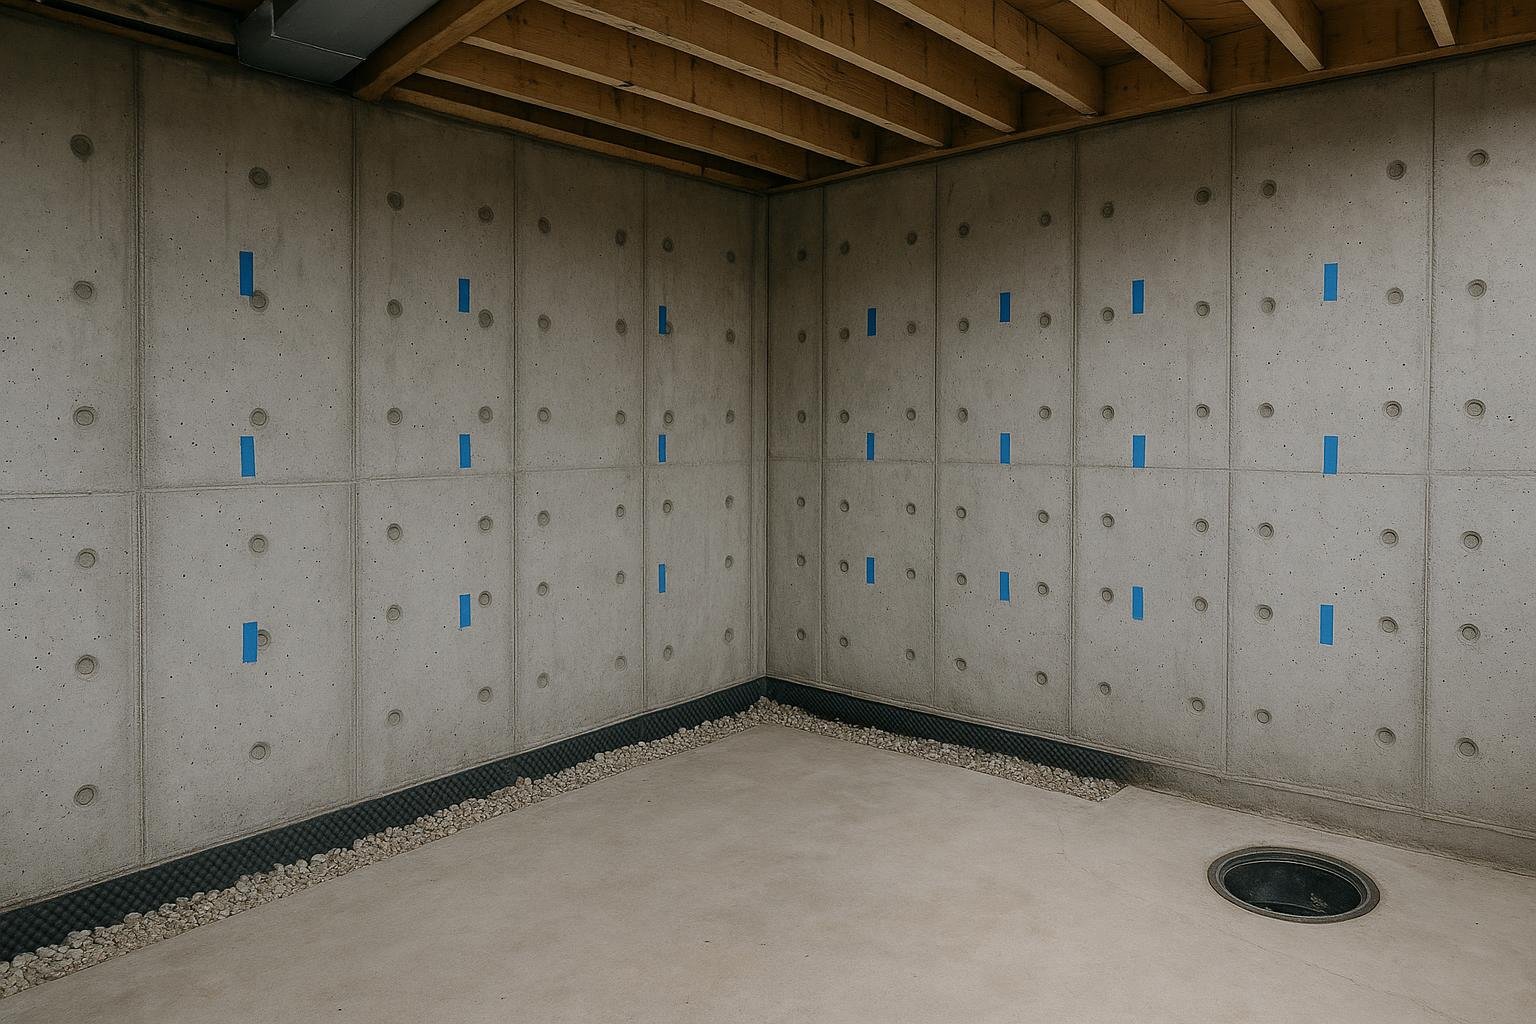
Snap tie holes appear as a regular grid of small circular depressions, typically 20–25 mm in diameter, spaced roughly 600 mm apart horizontally at consistent heights on a poured-concrete wall. The pattern follows the formwork panel layout, so you will see rows rather than random placement.
Signs that confirm a snap tie is the source:
- Moisture, dripping, or a rust-coloured stain originates precisely at one of these circular depressions, not from a crack running between them.
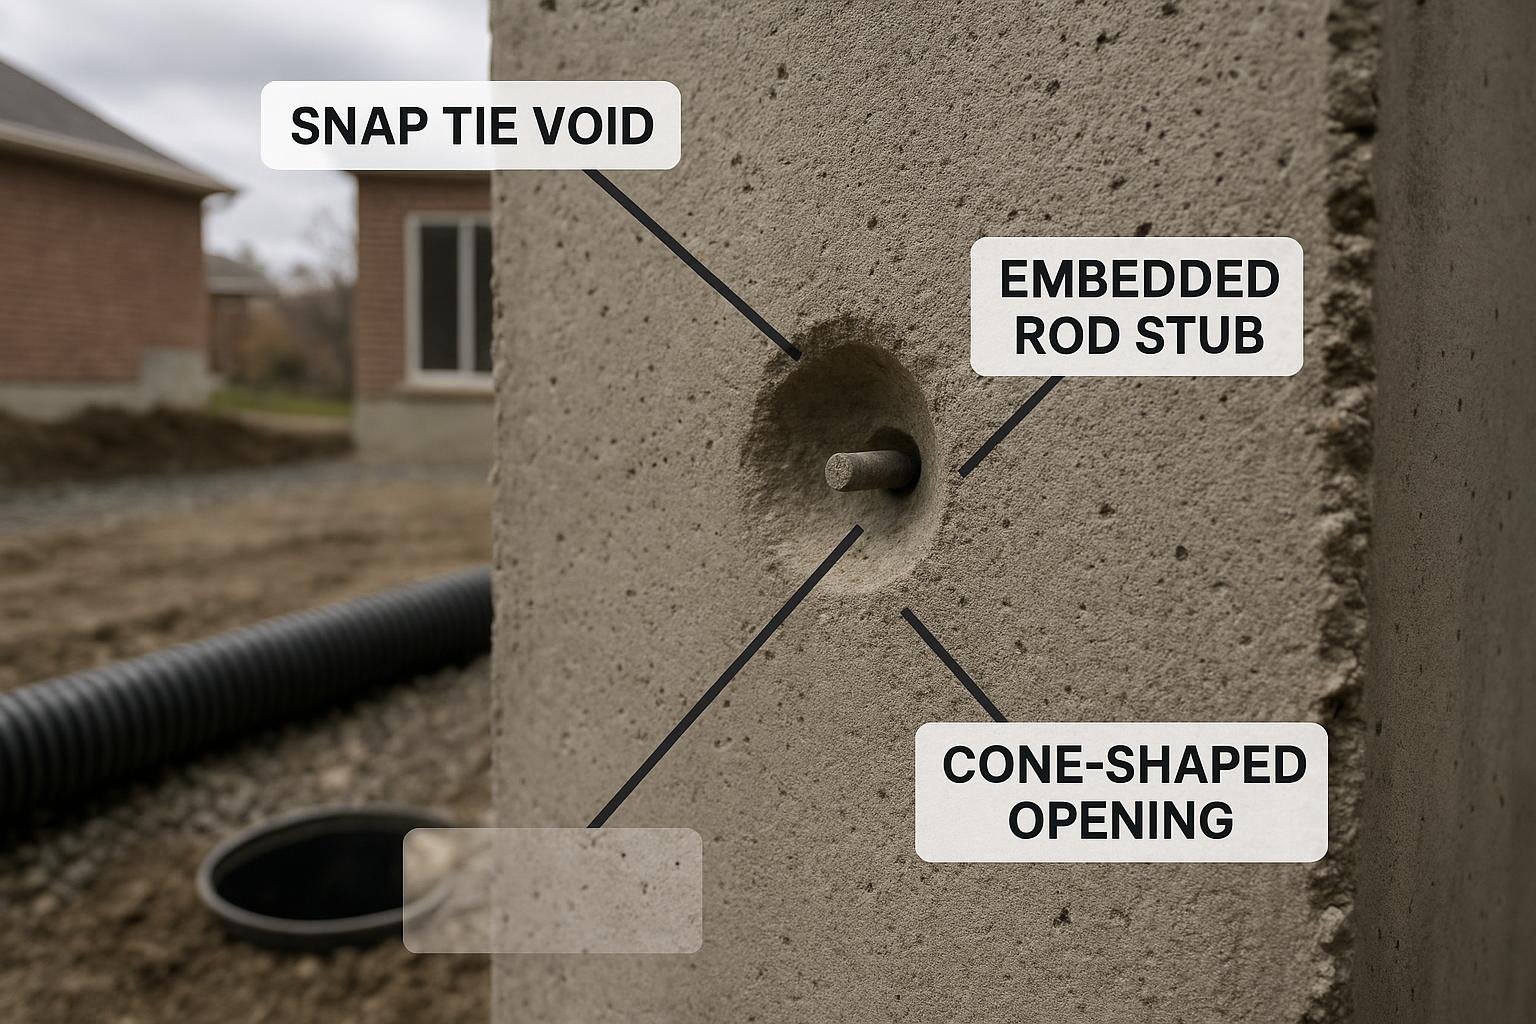
- The centre of the depression may show a small dark spot where the rod was snapped; in older homes a short stub may still be visible.
- Efflorescence forms a cone or fan shape radiating from the hole, indicating repeated water movement through that point. See the efflorescence problem page for related information.
- Leaking intensifies within 24–72 hours of heavy rain or rapid snowmelt, then slows as soil drainage reduces hydrostatic pressure.
- The surrounding wall is otherwise intact, with no visible crack extending from the hole.
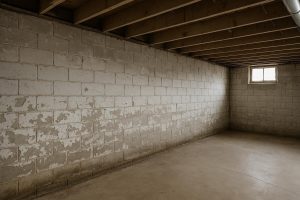
If the wall is block or brick rather than poured concrete, snap ties are not the cause; see the section below on look-alike problems.
Problems it gets confused with
Shrinkage or settlement cracks: These run vertically or diagonally across the wall face and are not centred on a circular depression. Water entry follows the crack line, not a grid pattern.
Cold joints: A horizontal line of seepage at the same height all the way around the wall indicates a cold joint where a pour was interrupted. The leak is linear, not at discrete points.
Conduit or pipe penetrations: Larger circular openings for plumbing or electrical sleeves can also leak, but they are not in a regular grid and are usually larger than a snap tie void.
Porous concrete (honeycombing): Widespread seeping through the wall face without a focal point suggests aggregate voids in the mix, not a tie hole.
Window well overflow: Water appearing below a basement window may look like a tie hole leak if a tie happens to be nearby, but the source is above, not through the wall itself.
Causes, ranked
1. Inadequate or missing cone fill at construction
When formwork is stripped, the outer plastic cone is pulled out, leaving a tapered void roughly 50–75 mm deep. Builders are expected to fill this with non-shrink grout or hydraulic cement before backfilling. When that step is skipped or done poorly, the void stays open. This is the most common reason snap tie holes leak. The telltale sign is that the hole leaks from the very first wet season after construction, with no history of prior dryness.
2. Corroded tie rod expanding the void
The steel stub left inside the wall corrodes over time. Oxidising steel expands and can fracture the surrounding concrete, enlarging the void and creating micro-cracks that radiate outward. The telltale sign is a rust stain that has grown larger over successive years, sometimes with small radial cracks around the depression.
3. Grout fill that has shrunk or debonded
Even when the cone void was filled at construction, ordinary Portland cement grout shrinks slightly as it cures. Freeze-thaw cycling can cause the plug to debond from the surrounding concrete, leaving a gap around its perimeter. The telltale sign is a ring of moisture around a plug that appears visually intact from the interior.
4. Elevated hydrostatic pressure from poor drainage
A dormant snap tie void can begin leaking when site drainage deteriorates: blocked weeping tile, failed window well drains, or soil settlement directing surface water toward the foundation. The telltale sign is that leaking starts or worsens after a drainage change or a particularly wet season, even though the wall was previously dry.
5. Mechanical damage to the interior plug
Interior finishing work, impact from stored items, or previous DIY attempts can dislodge a grout plug. The telltale sign is that leaking began shortly after renovation or after something struck the wall in that area.
6. Multiple simultaneous tie hole failures
In older poured-concrete homes, all tie holes were filled with the same materials at the same time. When conditions cause one to fail, others at the same depth often fail within one or two seasons. The telltale sign is several holes in the same horizontal row beginning to seep together.
Cause to solution table
| Cause | Telltale sign | Appropriate fix | Urgency |
|---|---|---|---|
| Missing or inadequate cone fill | Leaking from first wet season; open void visible | Polyurethane injection or hydraulic cement plug, then injection | Act soon to Act now |
| Corroded expanding tie rod | Growing rust stain; radial micro-cracks around hole | Injection to encapsulate; monitor for structural impact | Act soon |
| Shrunk or debonded grout plug | Ring of moisture around a visually intact plug | Remove old plug; polyurethane injection to re-seal | Act soon |
| Elevated hydrostatic pressure | New or worsening leak after drainage change | Injection seal plus drainage correction (weeping tile, grading) | Act soon to Act now |
| Mechanical damage to plug | Leak began after impact or renovation | Re-plug with hydraulic cement; injection if void is deep | Act soon |
| Multiple simultaneous failures | Several holes in same row seeping together | Systematic injection of all affected holes; assess drainage | Act now |
Match what you observe to the most likely cause before calling a contractor. If a rust stain is growing alongside radial cracking, ask the inspector specifically about rod condition. If multiple holes in the same row are failing together, drainage deserves equal attention alongside injection. The crack injection service page explains the injection process in more detail.
What you can safely check yourself
- Locate all tie holes: In good light, scan the entire poured-concrete wall surface. Mark each circular depression with painter’s tape so you have a complete map before calling a contractor.
- Check for active moisture: Press a dry paper towel against each marked hole for 30 seconds. A damp result confirms that hole is currently transmitting moisture.
- Look for rust staining: A rust-coloured streak below or around the hole indicates the embedded rod is corroding. Note which holes show this.
- Inspect for efflorescence: White chalky deposits indicate repeated water movement through that point over time.
- Check exterior grade: Walk outside and look at the soil level against the foundation. Soil sloping toward the wall, or a window well without a drain, increases hydrostatic pressure at tie hole depth.
- Time the leak: Note whether seeping increases within 24–72 hours of rain. This timing confirms hydrostatic pressure rather than condensation.
- Photograph everything: Date-stamped photos of each leaking hole help a contractor plan repair scope before arriving on site.
What NOT to do
- Do not apply hydraulic cement and consider the job done: A surface plug without full-depth void filling will debond under sustained hydrostatic pressure. It is a temporary measure only.
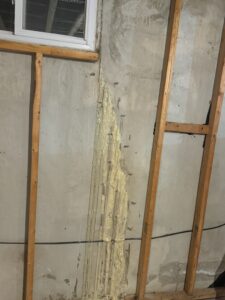
- Do not use silicone caulk or spray foam: Neither bonds reliably to wet concrete, and neither can withstand the pressure that drives water through a snap tie void.
- Do not paint over the hole with waterproofing paint: Crystalline or elastomeric coatings cannot bridge a void; they will blister and fail at the tie location.
- Do not ignore rust staining: Expanding corrosion can fracture the concrete around the hole, turning a minor repair into a more involved one.
- Do not attempt to drill out the rod without professional assessment: Drilling into a load-bearing wall without understanding rod depth and wall condition risks structural damage.
How a professional diagnoses it
A waterproofing technician begins with a visual inspection of the full interior wall surface, mapping every tie hole and noting which show moisture, rust, efflorescence, or radial cracking. They probe each suspect hole to assess void depth and whether the existing plug is intact or hollow.
Where active seeping is present, the technician checks whether the leak is pressure-driven by observing flow rate relative to recent rainfall. A moisture meter on the surrounding concrete shows how far saturation extends beyond the hole. The exterior drainage situation is also assessed: weeping tile condition, soil grade, and downspout discharge all influence whether injection alone will suffice or whether drainage improvements are needed alongside it.
For walls showing multiple simultaneous failures or significant rust expansion, the technician may recommend a structural assessment. The guide on identifying structural foundation cracks provides useful context on when engineering input is warranted. You can also use the basement leak diagnostic tool to document your observations before the visit.
Temporary vs permanent fixes
| Approach | What it involves | How long it lasts | Limitation |
|---|---|---|---|
| Hydraulic cement plug | Fast-setting cement packed into the void to stop active flow | Weeks to months under sustained pressure | Does not fill the full void depth; can debond and re-leak |
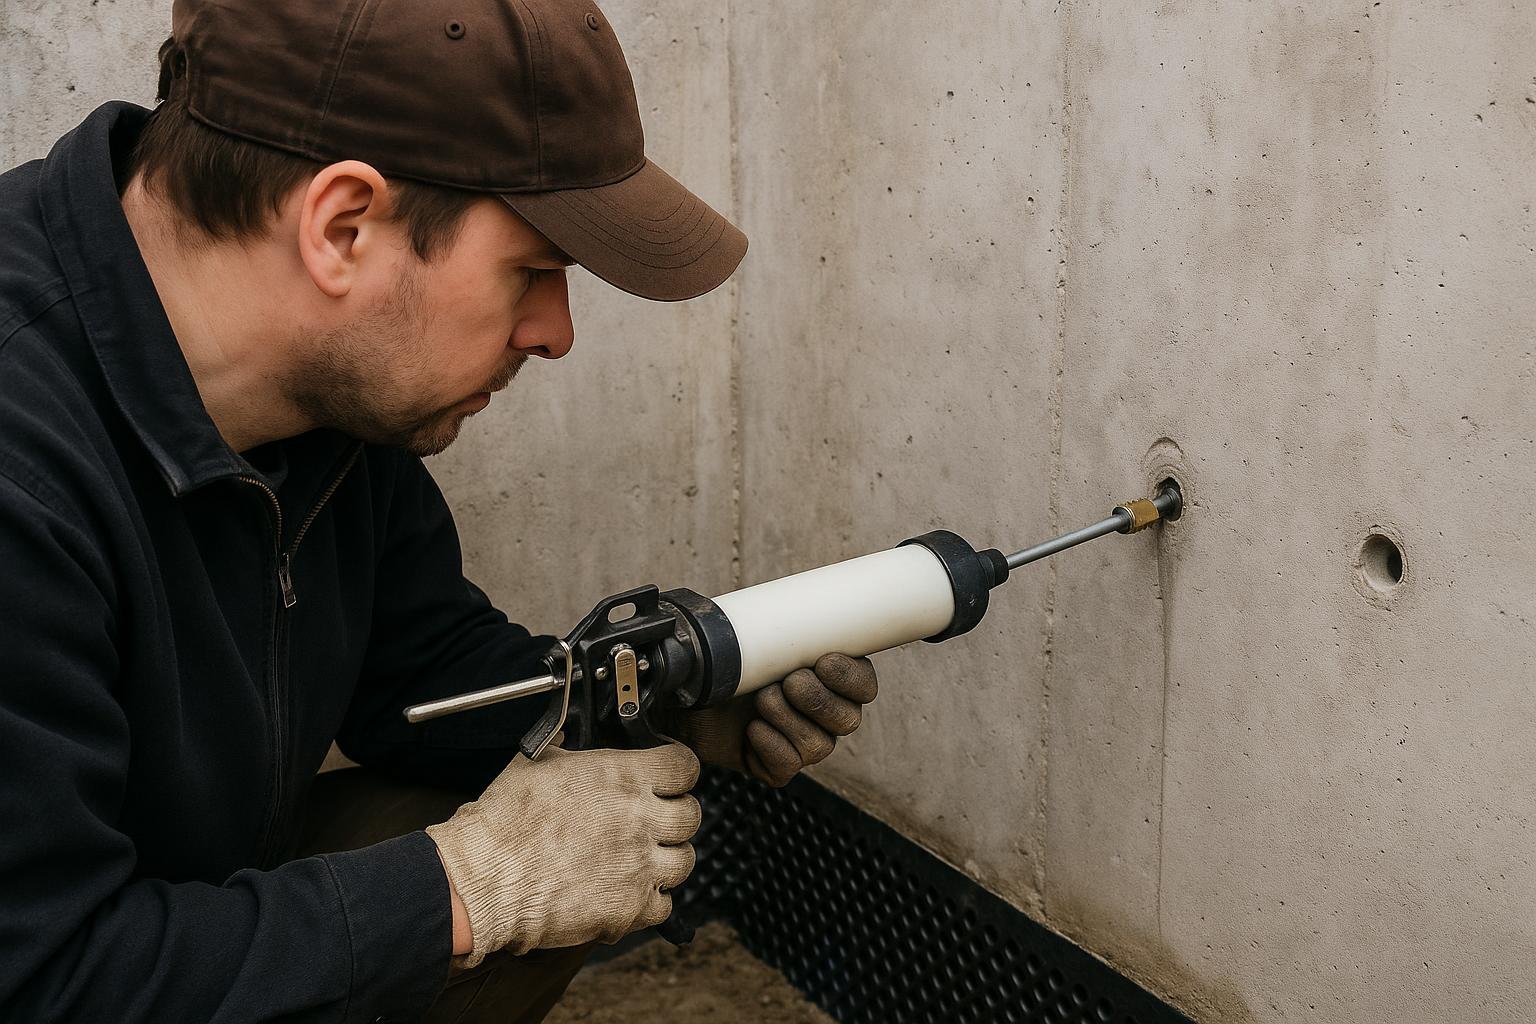
| Polyurethane injection (professional) | Expanding resin injected under controlled pressure to fill the void and bond to concrete | Long-term; DryShield backs this work with a lifetime transferable warranty | Active gushing may need hydraulic cement first to control flow |
| Epoxy injection (professional) | Rigid structural resin injected to bond and fill | Long-term; higher compressive strength than polyurethane | Requires a dry void; less flexible where movement may occur |
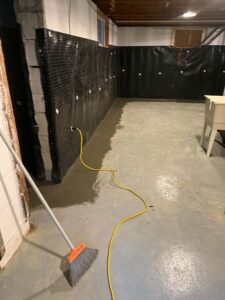
| Exterior excavation and membrane | Excavate to tie hole depth, apply waterproof membrane over wall face | Long-term; addresses exterior water before it reaches the wall | Significantly higher cost and disruption; warranted when multiple systems are failing simultaneously |
For most snap tie hole leaks, polyurethane injection from the interior is the appropriate permanent repair: minimally invasive, no excavation required, and when performed correctly it fills the full void depth. Hydraulic cement is a legitimate first-aid measure, not a finished repair. Exterior excavation is reserved for situations where the wall face needs a new membrane across a larger area or drainage infrastructure must be replaced at the same time. The guide on crack injection versus full waterproofing helps clarify when each approach is appropriate.
Frequently asked questions
What exactly is a snap tie and why does every poured-concrete wall have them?
A snap tie is a steel rod used to hold the two sides of a concrete form at a fixed distance apart while concrete is poured. Once the concrete cures and the forms are stripped, the rod is snapped off at a notch just inside the wall face, leaving a small stub embedded in the concrete and a cone-shaped void on each face. Because formwork requires ties at regular intervals to resist the pressure of wet concrete, every poured-concrete foundation wall has them in a grid pattern.
Are snap tie holes a structural problem or just a waterproofing problem?
In most cases they are a waterproofing problem only. The holes are small and the surrounding concrete retains its load-bearing capacity. However, if the embedded rod stub is corroding significantly and has caused radial cracking, a structural engineer’s opinion may be warranted. The guide on structural versus non-structural cracks provides additional context.
Can I fix a leaking snap tie hole myself?
You can apply hydraulic cement as a temporary measure to stop an active drip. A permanent repair requires filling the full void depth under controlled pressure with an injection resin. DIY injection kits exist, but achieving adequate penetration without professional equipment is difficult, and an incomplete fill will re-leak. For a lasting result, professional injection is the recommended approach.
Will the leak get worse if I ignore it?
Yes. Water moving through the void carries dissolved minerals that gradually erode the concrete around the hole. The embedded steel stub also continues to corrode, and corroding steel expands, which can fracture the surrounding concrete. What starts as a minor seep can become a more significant repair if left unaddressed. See the efflorescence problem page for related information on mineral leaching from ongoing water movement.
How many injection ports does a technician typically use for one snap tie hole?
For a standard snap tie void, one or two ports positioned at the hole itself are usually sufficient. If the surrounding concrete has developed micro-cracks from corrosion, additional ports may be placed along those cracks to ensure complete fill. The technician determines port placement after probing the void and assessing the surrounding concrete condition.
Does polyurethane injection work on a hole that is actively dripping?
Polyurethane foam resin is suited to wet and actively leaking conditions because it reacts with water to expand and cure. For a gushing hole, a hydraulic cement plug is typically applied first to reduce flow, and then injection is performed once flow is controlled. The polyurethane crack injection service page describes the material properties in more detail.
How long does the repair take and will I need to leave my home?
Injecting a small number of snap tie holes is typically a short appointment. You do not need to vacate your home. The injection resin cures within minutes to hours depending on the product and conditions. There is no excavation, no heavy equipment, and no significant disruption beyond the immediate work area. Cure times and post-repair instructions will be confirmed by the technician on the day.
Will my home insurance cover snap tie hole repairs?
Most standard Ontario home insurance policies treat gradual water infiltration through foundation defects as a maintenance issue rather than a sudden and accidental loss, so snap tie hole repairs are generally not covered. Coverage varies by policy and insurer. The guide on home insurance and foundation crack coverage in Ontario explains typical policy exclusions and what to ask your broker.
How much does snap tie hole injection cost?
DryShield does not publish fixed prices for individual snap tie repairs because cost depends on the number of holes, void depth, accessibility, and whether drainage work is required alongside injection. The crack injection cost page outlines general cost drivers for injection work in Southern Ontario, and the online cost calculator can provide a preliminary estimate. A confirmed quote requires an on-site assessment.
Can snap tie holes be sealed from the outside instead of the inside?
Yes. Exterior repair involves excavating to the depth of the affected holes, cleaning the wall face, and applying a waterproof membrane or injection from the outside. This is appropriate when exterior excavation is already planned for weeping tile replacement or full exterior waterproofing. For isolated snap tie holes with no other exterior work required, interior injection is far less disruptive and achieves the same sealing result.
If you are seeing moisture, rust staining, or active seeping at snap tie locations, the DryShield team can assess the full scope and recommend the right repair approach. Book a free assessment and a technician will inspect your foundation, map every affected hole, and provide a clear recommendation before any work begins.